
Table of Contents
A fresh leaf, a pair of jeans, and a scrap of printed paper are all you need for a first microscope lesson. Each gives kids something easy to find on the screen, whether it’s a branching vein, crossing threads, or the edge of a printed letter. A handheld digital microscope with a light above the sample works well for these kinds of surface details. If you’re planning a lesson on cells, you’ll usually need a microscope that shines light through a slide.
Start with three things your child already knows. Have them guess what each one will look like up close, then find one detail they couldn’t see with their eyes alone.
15 Everyday Things to Look at Under a Digital Microscope
Fresh Leaves, Dry Leaves, Bark, and Seeds
-
Fresh leaves. Lay a leaf flat and use a kids microscope to find where a small vein branches off the main one. Follow the smaller vein toward the edge. Can you find a spot where it branches again?
-
Dry leaves. Look at the edge for curls, cracks, and tiny tears. If you can find a fresh leaf from the same kind of plant, compare the edges and see which features the two leaves still share.
-
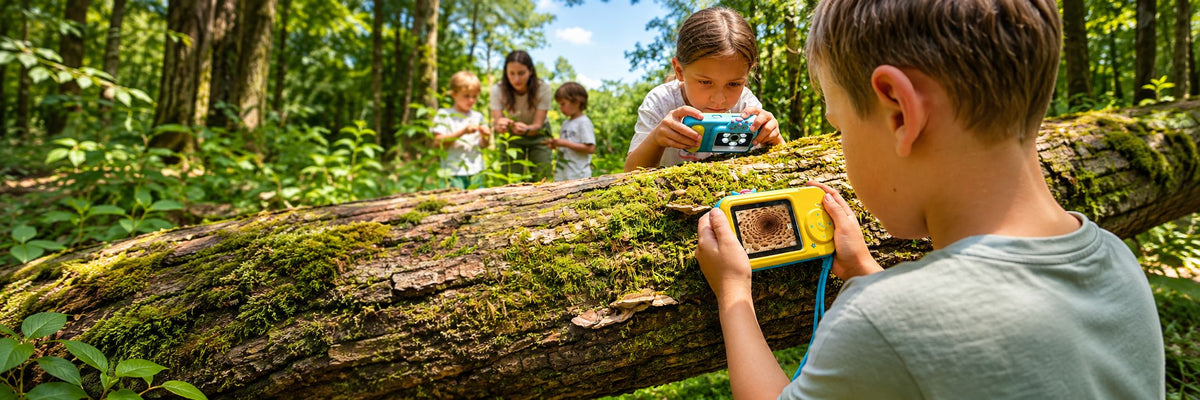
Bark. Set a piece of fallen bark on the table and look where a ridge meets a crack. Try turning the sample a little. Which features stay the same, and which look different as the shadows move?
-
Seeds. Compare two dried seeds, such as a bean and a sunflower seed. Look for smooth patches, ridges, or small marks on the outside. Could you tell the seeds apart from their close-ups alone?
Salt, Sugar, and Rolled Oats
-
Salt. Spread a pinch of table salt on dark paper so the grains sit apart. Look for a grain with straight edges and turn the paper slightly to see whether you can spot another face.
-
Sugar. Put a few granulated sugar crystals beside the salt and keep the light and zoom the same. Compare several grains from each pile. Which differences show up more than once?
-
Rolled oats. Start on the flat face of an oat flake, then move to a broken edge. Ask your child to sketch each view and point out what makes the edge easy to recognize.

Printed Text, Color Packaging, and Paper Towels
-
Printed text. Pick a large black letter and center the spot where the ink meets the white paper. A line that looks smooth from across the table may have a rougher edge up close.
-
Color packaging. A cereal box is an easy sample to try with a microscope for kids. Look closely at a colored patch near the edge of a picture. Some printed colors are made up of tiny dots that blend together at a normal viewing distance. Can you spot them up close?
-
Paper towels. Look at a torn edge, then move to one of the pressed patterns on the surface. Compare the towel with the printed paper. Where can you see individual fibers most clearly?
Denim, Cotton Shirts, and Yarn
-
Denim. Find an area where light and dark threads meet. Follow one thread across the screen and see where it passes over or under another. Then turn the fabric over and compare the two sides.
-
Cotton shirts. Lay a cotton T-shirt flat and look for rows of tiny loops. Compare those loops with the crossing threads in denim. Ask your child which feature they would use to tell the two fabrics apart.
-
Yarn. Look at the cut end of a short piece of yarn. Then look partway down the strand. You may see smaller strands twisted together. Can your child draw the direction of the twist?
Coins and Hook-and-Loop Fasteners
-
Coins. Set a penny or quarter flat and focus on the edge of a letter. Move from the raised face of the letter to the flatter area around it. Where do you see more scratches?
-
Hook-and-loop fasteners. Look at both sides of a fastener from a shoe or backpack. One side has tiny hooks, and the other has soft loops. After seeing both surfaces, ask your child to explain how they hold together.
How to Get a Clear Image on Your First Try
Start with a flat sample that has an easy-to-find feature, such as a printed letter or a thick leaf vein. Put it on the table, start at the lowest zoom setting available, and center that feature on the screen. Move the microscope a little closer or farther away until the detail comes into view. Then adjust the focus slowly.
If the image shakes, rest your wrist on the table or use the microscope’s stand. If part of the image looks washed out, lower the light or turn the sample slightly. Shiny objects like coins often look clearer after a small change in angle. Once the image is sharp, increase the zoom only if you need a closer look.
How to Turn Three Samples Into a 10-Minute Science Lesson
Try this with denim, a cotton T-shirt, and a piece of yarn. Give your child one question to answer. How are the threads arranged in each sample?
Spend the first two minutes looking at the samples with the naked eye and making a prediction. Use the next five minutes to look at each sample under the microscope. Keep the zoom and lighting the same where possible. Take a photo or make a quick sketch of one feature in each sample.
Spend the last three minutes comparing what you found. A younger child can point out a loop, a crossing thread, or a twist. An older child can write a sentence that connects an observation to the evidence, such as “I could tell the T-shirt apart from the denim because I saw rows of loops.”
When to Use a Compound Microscope for Slides
A handheld digital microscope with a light above the sample is useful for looking at the surface of a leaf, a piece of fabric, or a coin. If the lesson calls for seeing individual onion cells or comparing prepared plant and animal slides, use a compound microscope with a light below the slide. The light passes through the thin sample so you can see features inside it.
Some compound microscopes also display a digital image. When choosing one for a cell lesson, check whether it holds slides and lights them from below.
A Handheld Microscope for Homeschool Science
The TOMLOV P50K works well for quick observations with things you already have at home. Its 2.4-inch built-in screen lets your child see the image as they move from one part of a sample to another, without setting up a computer. Start with a flat leaf and have them follow a small vein from the center toward the edge.
When your child finds a detail they want to see more clearly, they can turn the focus wheel a little at a time. The P50K has four LED brightness settings, so they can lower the light if it washes out the texture on a glossy leaf or a piece of printed packaging. Try changing one setting at a time so they can see what made the image clearer.
The built-in camera also gives your child something to work with after they put the microscope down. Have them take one photo of a fresh leaf and one of a dry leaf, then put the images side by side. Ask them to point out one detail the leaves share and one difference they can show you in the photos.
Final Thoughts
Let your child choose the sample for the next session based on what surprised them today. If the two sides of denim looked different, they might want to compare the front and back of another fabric. That gives your next homeschool science lesson a question your child came up with and a simple way to investigate it.
Still choosing a microscope for your homeschool lessons? Browse TOMLOV microscopes for kids to compare handheld models for quick discoveries and tabletop options for activities you can do together.
Frequently Asked Questions
Do I Need a Computer to Use a Digital Microscope?
It depends on the model. A microscope with a built-in screen usually lets you see the live image on the device. A USB microscope without its own screen needs a compatible computer or another supported device. If you plan to use a Chromebook or tablet, check that your specific model supports it before the lesson.
How Can Two Kids Share One Digital Microscope?
Give each child a job. One can operate the microscope while the other watches the screen and describes what they see. Switch roles after each sample so both get a turn finding and focusing on a detail. If the screen is small, save a photo and look at it together.
Can We Use a Digital Microscope Outdoors?
A battery-powered model with a built-in screen can be convenient outdoors. Find a shaded spot so the screen is easier to read, and use a dry, steady surface for your sample. On a windy day, bring a fallen leaf or piece of bark inside for a closer look.

Commenta
Nota che i commenti devono essere approvati prima di essere pubblicati.
Questo sito è protetto da hCaptcha e applica le Norme sulla privacy e i Termini di servizio di hCaptcha.