
Table of Contents
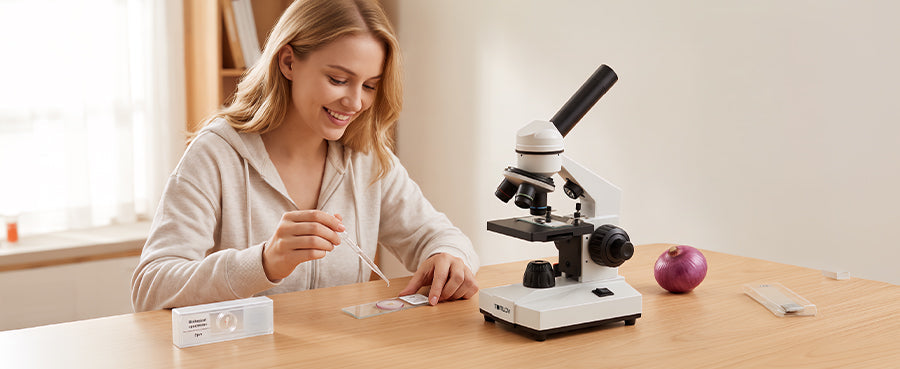
Preparing microscope slides correctly is the foundational skill required for high-clarity optical observation. This comprehensive guide details the essential supplies needed, explains the differences between wet, dry, and smear mounting techniques, and outlines the step-by-step process to safely prepare and view your specimens.
Gather Your Slide Preparation Supplies
Before placing anything under the lens, assembling the correct tools prevents delays and ensures a sterile, well-structured sample. Having everything within reach minimizes the risk of contaminating delicate specimens.
Choose Clean Slides and Coverslips
Dust and fingerprints will ruin your high-magnification images. Always start with spotless, optical-grade glass slides. Coverslips are the incredibly thin, fragile squares of glass placed over the sample; handle both components exclusively by their edges to keep the viewing area perfectly clear.
Prepare a Dropper and Tweezers
Precision is essential when handling microscopic matter. Fine-tipped tweezers allow you to position tiny structures without crushing them or overlapping the tissue. A standard glass or plastic dropper is required to dispense exact, single drops of liquid without flooding the slide.
Select Water or Mounting Liquid
Distilled water is the most common and accessible medium for basic wet mounts. If you need to keep a slide from drying out over a longer observation period, specialized viscous mounting fluids like glycerin or synthetic resins are utilized to permanently preserve the specimen.

Use Stain When More Contrast Is Needed
Most biological cells are entirely transparent. Chemical stains, such as iodine or methylene blue, are utilized to introduce artificial contrast. The dye binds to specific cellular components, making invisible structures like the cell wall or the nucleus clearly stand out against the bright background.
Choose the Right Preparation Method
Not all samples can be prepared using the exact same technique. Selecting the appropriate mounting method depends entirely on the physical characteristics and moisture content of your specific specimen.
Use a Wet Mount for Living Specimens
This technique suspends the sample in liquid, keeping it hydrated and allowing for the observation of living organisms. It is the standard method for viewing pond water microorganisms, aquatic plant cells, or cheek cell swabs.
Use a Dry Mount for Hair and Fibers
This is the simplest preparation method, requiring zero liquid. It is strictly used for inorganic materials or dead, dehydrated biological matter. Items like synthetic clothing fibers, pollen grains, insect wings, and human hair are perfectly suited for dry mounting.
Use a Smear for Liquid Cell Samples
A smear forces dense, clumped liquids into a single, observable layer of cells. It is the mandatory preparation method for viewing blood samples, bacterial cultures, or heavy fluids that would otherwise be too opaque for transmitted light to pass through.
Use a Thin Section for Thick Tissues
Standard light compound microscopes require light to pass completely through the sample. Thick biological objects, like plant stems or thick roots, must be sliced razor-thin using a scalpel or a specialized tool called a microtome before they can be mounted and viewed.
Prepare a Wet Mount Slide
The wet mount is the most common technique used in biology laboratories, allowing you to observe living organisms in their natural hydrated state. Mastering this method requires careful liquid management to prevent distracting air bubbles.
Clean and Label the Slide
Begin by wiping the glass slide with specialized lens paper. If you are preparing multiple samples for a biology project, place a tiny piece of tape on the frosted end of the glass and label it with a pen to avoid confusing your specimens later.
Place a Thin Specimen in the Center
Use your precision tweezers to pick up your thin tissue sample and place it dead center on the glass. Ensure the tissue is lying completely flat; if the edges fold over, the overlapping cell walls will create a dense, dark mass that cannot be focused clearly.
Add One Drop of Liquid
Hold your dropper perfectly vertical over the slide and gently squeeze out exactly one drop of distilled water directly onto the specimen. Over-wetting the slide will cause the coverslip to float away, while under-wetting will leave dry, unobservable pockets of air.
Lower the Coverslip at an Angle
This is the most critical step to avoid trapping air bubbles. Hold the coverslip at a 45-degree angle, resting one edge on the glass slide so it touches the edge of the water drop. Slowly and gently lower the coverslip down over the sample like a trapdoor, pushing the air out as it falls.
Blot Away Excess Liquid
If water escapes from under the edges of the coverslip, the slide will slide around the microscope stage. Take a small piece of paper towel and gently touch it to the side of the coverslip to wick away the excess moisture and lock the glass securely in place via surface tension.
Prepare a Dry Mount Slide
Dry mounting is the fastest preparation method, ideal for examining the surface textures of opaque or completely dehydrated materials. It requires no liquids, stains, or complex chemical procedures.
Choose a Thin and Dry Specimen
Select a sample that does not require hydration to maintain its physical structure. Salt crystals, grains of sand, printed newspaper fibers, and dry flower petals are excellent subjects.
Place the Specimen in the Center
Lay the specimen flat in the middle of the clean glass slide. If the object is too large or bulky, use a scalpel to trim it down. You only need a fraction of a millimeter of material to fill the entire field of view under a microscope.
Add the Coverslip Carefully
Even though there is no liquid involved, you must still place a coverslip over the sample. This flattens the specimen slightly, keeps it from blowing away if you breathe on it, and acts as a physical barrier to protect your expensive objective lenses from touching the raw material.
Prepare a Smear Slide
Smear slides are necessary when dealing with thick liquids or dense bacterial cultures that naturally clump together. This technique mechanically forces the cells into a single, highly readable layer.
Place a Small Sample on the Slide
Deposit a single, tiny drop of your liquid sample—or rub your bacterial swab—about half an inch away from the edge of a clean glass slide, rather than directly in the center.
Spread the Sample into a Thin Layer
Take a second, clean glass slide and hold it at a 45-degree angle against the first slide. Pull it backward until it touches the drop of liquid, allowing the fluid to spread along the edge of the angled glass. Then, smoothly push the angled slide forward across the bottom slide, smearing the liquid into a thin, even film.
Let the Smear Air Dry
Do not immediately add a coverslip or wet stain to a fresh smear. You must let the slide sit at room temperature until the liquid has completely evaporated. If you introduce new liquids before the smear dries, you will simply wash all the unanchored cells right off the glass.
Apply a Suitable Stain
Once completely dry, you can apply a chemical stain by dropping it directly over the smeared film. Depending on the specific biological protocol, you may need to gently rinse the slide with distilled water after a few minutes to remove the excess dye before observation.
Place the Slide Under the Microscope
Once your slide is perfectly prepared, proper placement and optical focusing techniques ensure you capture a sharp image without physically crushing your delicate glass components.
Position the Coverslip Facing Up
Always ensure the slide is placed on the mechanical stage right-side up. If you accidentally place the slide upside down, the physical thickness of the glass slide itself will prevent high-power objective lenses from getting close enough to reach a proper focal point.
Start with the Lowest Magnification
Always rotate your microscope’s nosepiece so the shortest, lowest-power objective lens (typically 4x) is pointing at the stage. This provides the widest possible field of view and the greatest physical working distance, allowing you to easily locate the specimen without striking the glass.
Center and Focus the Specimen
Use the mechanical stage controls to move the slide until the specimen is hovering directly over the light source. Look through the eyepieces and turn the coarse focus knob until the cellular structures snap into sharp relief.
Increase Magnification Gradually

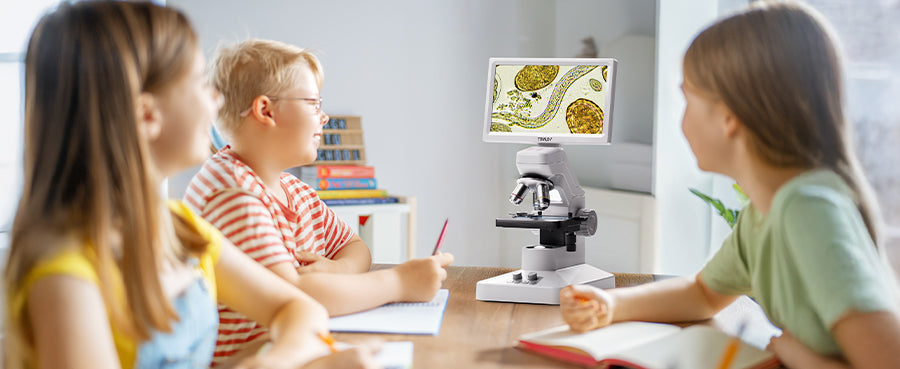
Once focused on low power, physically rotate the nosepiece to the next highest objective (10x, then 40x). At higher magnifications, the lens sits incredibly close to the glass, making precision mechanics critical. Using a well-engineered instrument like the Tomlov fine focus microscope allows you to utilize dedicated fine-focus controls, letting you safely dial in extreme cellular details without accidentally driving the lens down through your fragile coverslip.
Clean Up Safely
Proper laboratory hygiene prevents cross-contamination and protects both you and your equipment. Establishing a strict cleanup routine is just as important as the observation itself.
Handle Slides and Coverslips Carefully
Microscope slides and coverslips are made of extremely thin, brittle glass that can easily shatter into sharp splinters. Remove them from the mechanical stage slowly to avoid scraping the objective lenses, and handle them by the edges to avoid cutting your fingers.
Dispose of Specimens and Stains Properly
Never blindly wash biological waste or chemical dyes down a standard sink. Dispose of biohazardous materials, sharp broken glass, and harsh chemical stains in designated, safe laboratory waste receptacles according to your specific safety guidelines.
Clean Reusable Slides
Standard glass slides can be washed and reused. Clean them gently with warm water and a mild laboratory detergent, rinse them thoroughly with distilled water, and dry them with lint-free optical paper to prevent microscopic scratching. Most thin glass coverslips are considered single-use and should be discarded.
Store the Microscope Correctly
Before walking away, lower the mechanical stage completely and switch the nosepiece back to the lowest power objective. Turn off the illumination, unplug the power cable safely, and always cover the entire instrument with a vinyl dust jacket to protect the optical pathways from environmental debris.
Conclusions
Mastering slide preparation is the key to unlocking the microscopic world. By gathering the correct supplies and understanding when to utilize wet mounts, dry mounts, or smears, you ensure that every specimen is displayed with maximum clarity. Coupling careful preparation with methodical focusing and safe cleanup habits guarantees a professional, highly rewarding microscopy experience.
Microscope Slide Preparation FAQs
What liquid do you use for microscope slides?
Distilled water is the universal standard for temporary wet mounts. For specific biological applications, a 0.9% saline solution may be used to match the natural salinity of animal cells, preventing them from swelling or shrinking during observation.
How to stain slides for a microscope?
To stain a wet mount without lifting the coverslip, place a single drop of chemical stain on one edge of the coverslip. Then, place a small piece of paper towel against the exact opposite edge. The paper towel acts as a wick, pulling the liquid stain underneath the glass and directly across the specimen.
Can Microscope Slides Be Reused?
Yes, the thicker rectangular glass slides are highly durable and can be washed, sterilized, and reused indefinitely as long as they are not scratched. Conversely, the ultra-thin glass coverslips placed on top of the sample are usually extremely brittle and are often treated as disposable items.
Can you use food coloring to stain microscope slides?
Yes, basic liquid food coloring is an excellent, safe alternative to harsh chemical stains for home or classroom use. A drop of blue or red food coloring works exceptionally well for highlighting the cell walls and nuclei of plant specimens like onion skins.
What are some household items I can put under a microscope?
The best beginner specimens are thin or highly textured. Granules of salt and sugar, printed newspaper, various fabric fibers, human hair, dust bunnies, and incredibly thin slices of vegetables or leaves all provide fascinating structural details without requiring complex chemical preparation.


发表评论
所有评论在发布前都会经过审核。
此站点受 hCaptcha 保护,并且 hCaptcha 隐私政策和服务条款适用。