
Table of Contents
Archaeology is often associated with excavation, ancient cities, pottery shards, bones, and buried tools. But some of the most important discoveries happen after an object leaves the ground. Once an artifact reaches a lab, researchers need to understand what it is made of, how it was used, how it aged, and how to protect it from further damage. Microscopy helps answer these questions by revealing details that are too small to see with the naked eye. Under magnification, a small scratch, fiber, mineral grain, pigment layer, or corrosion pattern can become valuable evidence. For archaeologists and conservators, microscopes are not just lab tools. They are a practical bridge between discovery, interpretation, and long-term preservation.
Why Microscopy Matters In Archaeology
Microscopy helps archaeologists study artifacts without immediately cutting, cleaning, or altering them. Many ancient objects are fragile, rare, or one of a kind. That means researchers need methods that can collect information while keeping the object as intact as possible.
It Reveals Hidden Surface Details
Many artifacts carry small traces of human activity. A stone tool may have tiny edge wear from cutting hide or scraping wood. A ceramic fragment may show brush marks, mineral inclusions, or firing defects. A metal object may show corrosion layers that explain how it reacted with soil, water, and oxygen over time.
These details are often invisible under normal lighting. A microscope allows researchers to inspect texture, wear, residue, cracks, tool marks, and surface deposits in a controlled way. Instead of guessing how an object was made or used, archaeologists can support their interpretation with physical evidence.
It Helps Identify Materials
Artifacts are not always easy to identify by appearance alone. A bead may look like glass but contain mineral or shell components. A painted surface may include several pigment layers. A textile fragment may be made from plant fiber, animal fiber, or a blend.
Microscopy helps researchers compare shape, structure, grain, layering, and fiber patterns. This can help distinguish bone from ivory, handmade pottery from industrial ceramic, natural pigment from later restoration paint, or corrosion from intentional surface treatment.
It Supports Careful Documentation
Archaeological work depends on accurate records. Once an object is cleaned, stabilized, or restored, its original condition may change. Microscopy makes it easier to document small features before treatment begins.
Conservators often take magnified photos of cracks, stains, lifting paint, tool marks, residues, and unstable areas. These images become part of the artifact’s conservation record. They also help future researchers understand what was observed, what was treated, and what should be monitored over time.

How Microscopy Helps Identify How Artifacts Were Made
Artifacts contain manufacturing clues. Even a small fragment can show how people shaped, fired, polished, painted, carved, woven, or assembled materials.
Studying Tool Marks And Production Techniques
Microscopes can reveal whether a surface was cut, drilled, ground, scraped, polished, cast, or hammered. For example, a bone needle may show parallel scraping marks from shaping. A metal blade may show hammering patterns or polishing lines. A carved object may show differences between hand tools and later machine tools.
These marks help archaeologists understand the technology available to a culture. They can also show whether an object was locally produced, imported, repaired, reused, or modified.
Reading Ceramic And Pottery Surfaces
Pottery is one of the most common archaeological materials. Under magnification, ceramic fragments can show temper particles, clay texture, glaze layers, slip, painted decoration, and firing changes.
A microscope can help researchers see whether a pot was wheel-thrown, hand-built, burnished, painted, or glazed. It can also reveal inclusions such as sand, shell, plant material, or crushed rock. These details help connect pottery to specific production traditions, regions, or trade networks.
Examining Pigments And Paint Layers
Painted artifacts often have complex surfaces. A wall painting, sculpture, mask, ceramic vessel, or manuscript may contain several layers of pigment, binder, coating, dirt, and later restoration material.
Microscopy helps conservators inspect these layers without rushing into treatment. They may find that a dull surface still has original paint beneath dirt. They may also discover that a bright color belongs to a later repainting rather than the original artifact. This distinction matters because conservation should preserve historical evidence, not erase it.
How Microscopy Helps Understand Artifact Use
Artifacts are not only objects. They are records of behavior. Microscopy can show how people used, handled, repaired, and discarded them.
Use Wear On Stone And Metal Tools
Stone tools often develop microscopic wear patterns along their edges. Cutting meat, scraping hide, drilling shell, working wood, and harvesting plants can leave different kinds of polish, rounding, chipping, or striation.
Metal tools can also show wear. A blade may have fine scratches from repeated sharpening. A needle may show polish near the eye from thread movement. A coin may show wear patterns from circulation. These clues help researchers understand the function of an object beyond its shape.
Residue From Food, Plants, Or Other Materials
Sometimes small residues remain on artifacts long after use. Grinding stones may hold starch grains or plant particles. Pottery may preserve traces of soot, oil, resin, or food residue. Tools may retain small fibers, mineral grains, or organic remains.
Microscopy helps locate and examine these residues. In some cases, researchers can connect an object to cooking, medicine, craft production, farming, hunting, or ritual activity.
Handling And Repair Evidence
Some artifacts show evidence of long use. A repaired ceramic vessel may have drilled holes for binding. A worn handle may show where fingers repeatedly touched the surface. A textile may show stitched repairs or fiber breaks.
These details make archaeology more human. They show that objects were not always discarded when damaged. People repaired, adapted, valued, and reused them.

How Microscopy Supports Artifact Conservation
Conservation is not the same as making an object look new. The goal is to stabilize, preserve, and understand the artifact while respecting its history. Microscopy supports that work at every stage.
Assessing Damage Before Treatment
Before conservators clean or repair an artifact, they need to know how fragile it is. A microscope can show cracks, flaking paint, loose fibers, salt crystals, insect damage, mold growth, corrosion, and surface instability.
This helps conservators choose a safer treatment plan. For example, a metal object with active corrosion may need a different approach than one with stable surface deposits. A painted artifact with lifting pigment may need consolidation before cleaning. A textile with broken fibers may need support before handling.
Cleaning With More Control
Cleaning is one of the most delicate parts of conservation. Dirt, corrosion, or old adhesive may cover important original material. Removing too much can permanently damage the artifact.
Microscopy allows conservators to clean slowly and precisely. Under magnification, they can see the boundary between dirt and original surface more clearly. This is especially useful for coins, ceramics, painted objects, manuscripts, jewelry, and small decorative items.
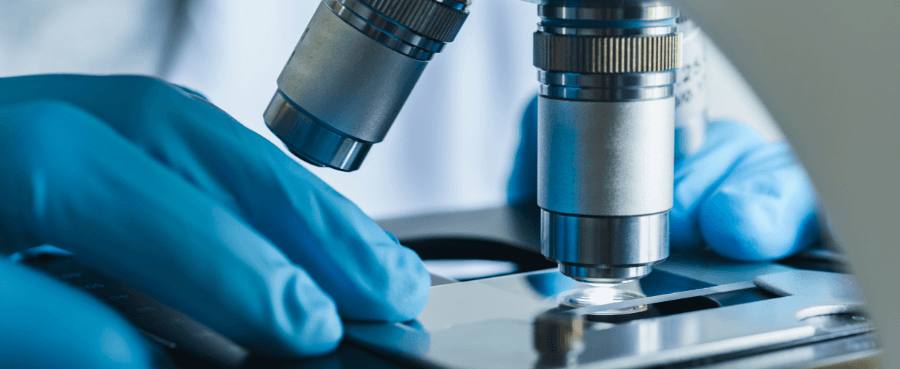
For small objects or detailed surfaces, a Digital microscope can be especially useful because it allows users to view magnified details on a screen, capture images, compare before and after treatment, and share observations with a team.
Related Reading: What is a 3D digital microscope?
Monitoring Changes Over Time
Some damage does not happen all at once. Corrosion can slowly spread. Paint can continue to lift. Organic materials can become brittle. Salt crystals can grow when humidity changes.
Microscopy helps conservators monitor these changes over time. By comparing magnified images from different dates, they can see whether a crack has expanded, a surface has flaked, or corrosion has become active. This makes conservation more preventive and less reactive.
Common Types Of Microscopy Used In Archaeology
Different microscopes serve different purposes. The best choice depends on the material, the research question, and whether the artifact can be sampled.
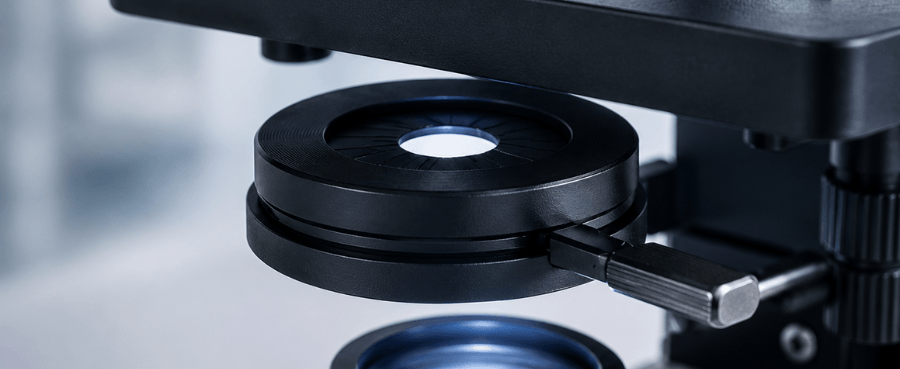
Stereo Microscopy For Surface Study
A stereo microscope gives a three-dimensional view of an object’s surface. It is often used for coins, pottery, bones, stone tools, textiles, and small artifacts. Because it works well at lower magnifications, it is useful for examining texture, cracks, tool marks, surface deposits, and overall condition.
Stereo microscopy is common in conservation labs because it supports hands-on work. Conservators can inspect, clean, and document small areas while seeing depth and surface shape.
Compound Microscopy For Tiny Samples
A compound microscope is used for thin or small samples that light can pass through. It can help examine fibers, pigment particles, soil particles, plant remains, starch grains, pollen, and other microscopic evidence.
This method usually requires a sample, so it is used carefully. When sampling is allowed, compound microscopy can provide information that surface inspection alone cannot.
Digital Microscopy For Documentation And Teaching
Digital microscopy is useful when images need to be displayed, saved, compared, or shared. Instead of looking only through eyepieces, users can view the enlarged image on a monitor.
This is helpful in classrooms, field labs, museums, and conservation studios. It allows more than one person to observe the same detail at once. It also makes it easier to create visual records for reports, treatment files, and educational materials.
Advanced Microscopy For Specialized Research
Some archaeological labs use advanced methods such as scanning electron microscopy, polarizing microscopy, or infrared and ultraviolet imaging. These tools can help identify mineral composition, surface structure, pigment behavior, and material changes in greater detail.
These techniques are powerful, but they are not always necessary for everyday conservation decisions. Many practical questions can begin with basic magnification, careful observation, and good documentation.
Examples Of Microscopy In Artifact Conservation
Microscopy can be applied to many artifact types. Each material presents different risks and research opportunities.
Metals
Metal artifacts often suffer from corrosion. Iron may rust and expand. Copper alloys may develop green or blue corrosion products. Silver may tarnish. Microscopy helps conservators distinguish stable corrosion from active corrosion and identify weak areas before treatment.
It can also reveal manufacturing evidence such as casting bubbles, hammer marks, engraving lines, and polishing scratches.
Ceramics And Glass
Ceramics and glass may seem stable, but they can have cracks, glaze loss, salt deposits, or old repair materials. Microscopy helps identify breaks, surface coatings, mineral deposits, and restoration joins.
For decorated ceramics, magnification can show whether painted details are original or added later. It can also help conservators avoid removing fragile decoration during cleaning.
Textiles And Organic Materials
Textiles, basketry, leather, wood, and paper are highly sensitive to handling, light, humidity, and pests. Microscopy helps identify fiber type, weave structure, insect damage, mold, stains, and breaks.
For textiles, seeing the fiber structure can guide storage and support decisions. A brittle fabric may need a custom mount. A torn edge may need stabilization before display.
Bone, Shell, And Ivory
Bone, shell, and ivory can look similar, especially after aging. Microscopy helps identify structural patterns that distinguish one material from another. It can also show tool marks, polishing, burning, weathering, and surface cracking.
This information matters because different materials need different conservation environments and handling methods.
Microscopy And Ethical Conservation
Microscopy also supports ethical decision-making. Archaeological artifacts belong to cultural, historical, and sometimes sacred contexts. Conservation should not erase evidence, over-clean surfaces, or create a false sense of newness.
Avoiding Unnecessary Intervention
Magnified inspection can show whether treatment is truly needed. Sometimes a surface deposit is historically important. Sometimes cleaning would remove evidence of use. Sometimes a crack looks serious to the naked eye but is stable under magnification.
By observing first, conservators can avoid aggressive treatment and choose the least invasive option.
Separating Original Material From Later Changes
Many artifacts have long histories after their original use. They may have been repaired, repainted, buried, cleaned, collected, or restored. Microscopy helps separate original material from later additions.
This does not always mean later changes should be removed. In some cases, old repairs are part of the object’s history. The important point is that conservators need to understand what they are looking at before making decisions.
Creating Better Records For Future Researchers
Good conservation records protect future research. Microscopy images can show what an artifact looked like before treatment, what areas were unstable, and what details were discovered.
These records are useful for museums, archaeologists, students, curators, and future conservators. They help ensure that today’s decisions remain transparent.
Why Microscopy Is Valuable For Students And Small Labs
Microscopy is not only for major museums or research institutions. Students, small labs, field teams, and local history groups can also benefit from magnified inspection.
It Makes Small Evidence Easier To Understand
Many archaeological clues are subtle. A beginner may not notice edge wear, fiber direction, pigment layering, or corrosion activity at first glance. Magnification makes these features easier to see and discuss.
This helps students develop observation skills. It also makes archaeology feel more evidence-based because learners can connect interpretation to visible details.
It Improves Field And Lab Communication
When a team can capture and share magnified images, communication improves. A field archaeologist can document a fragile find before transport. A conservator can explain why a surface should not be cleaned aggressively. A curator can compare condition changes before and after display.
Clear images reduce guesswork and help teams make better decisions.
It Supports Public Education
Museums and classrooms can use microscopy to show visitors what makes an artifact important. A small pottery shard may look ordinary in a display case, but under magnification it can reveal brush strokes, mineral grains, or finger marks.
This gives the public a closer connection to the past. It also shows that archaeology is not only about finding objects, but also about studying them carefully.
Final Thoughts
Microscopy gives archaeology a closer, more careful way to read the past. It helps researchers study materials, production methods, use wear, residues, damage, and conservation needs without relying only on what can be seen by the naked eye. For artifact conservation, this matters because every treatment decision should begin with observation. A small crack, pigment layer, fiber break, or corrosion pattern can change how an object is cleaned, stored, restored, or displayed. Whether used in a museum lab, university classroom, field station, or small collection, microscopy supports better documentation and safer preservation. Most importantly, it helps protect artifacts as historical evidence, not just display objects. The closer we look, the more carefully we can preserve the stories these objects carry.
Commenta
Nota che i commenti devono essere approvati prima di essere pubblicati.
Questo sito è protetto da hCaptcha e applica le Norme sulla privacy e i Termini di servizio di hCaptcha.