Microscope focusing may look simple, but the fine and coarse adjustment knobs play a major role in how clearly you can see a specimen. These two knobs control the distance between the objective lens and the slide, helping you bring tiny details into focus. The coarse adjustment knob is used for large, quick movements, while the fine adjustment knob is used for small, precise corrections. Knowing when to use each one can prevent blurry images, protect slides from damage, and make the microscope easier to use, especially for beginners. In this guide, we will explain the functions of fine and coarse adjustment knobs in microscopes, how they work, when to use them, and common mistakes to avoid.
What Are Fine And Coarse Adjustment Knobs?
Fine and coarse adjustment knobs are focusing controls found on most compound microscopes. They help move the stage or the microscope head so the specimen can be brought into clear view.
The coarse adjustment knob makes larger movements. It is mainly used when you are first trying to locate the specimen at low magnification. The fine adjustment knob makes much smaller movements. It is used after the specimen is already visible and you want to sharpen the image.
Although both knobs are part of the same focusing system, they should not be used in the same way. The coarse adjustment knob is for finding the image. The fine adjustment knob is for refining the image.
Why These Knobs Matter
Without proper focusing, even a good microscope can produce blurry or confusing images. Many beginner problems are not caused by poor microscope quality. They happen because the user starts at high magnification, turns the wrong knob, or moves the lens too close to the slide.
Learning how to use the adjustment knobs correctly makes the viewing process smoother, safer, and more accurate.

Function Of The Coarse Adjustment Knob
The coarse adjustment knob is the larger focusing knob on most microscopes. Its job is to move the stage or body tube quickly over a larger distance.
This large movement helps you bring the specimen into general focus. When you first place a slide on the stage, the specimen may be far out of focus. The coarse adjustment knob lets you quickly move toward the correct focus point.
Used For Initial Focusing
The main function of the coarse adjustment knob is initial focusing. You use it at the beginning of the viewing process, usually with the lowest power objective lens.
For example, if you are using a 4x objective lens, the coarse adjustment knob helps you quickly find the sample. Once the image appears, you stop using the coarse knob and switch to the fine adjustment knob.
Best Used At Low Magnification
The coarse adjustment knob should normally be used only with low magnification. At low power, there is more space between the objective lens and the slide. This gives you more room to adjust safely.
At higher magnification, the objective lens sits much closer to the slide. If you turn the coarse adjustment knob too much, the lens may hit the slide and damage the specimen, the slide, or the lens itself.
Helps Locate The Specimen Faster
Low magnification gives you a wider field of view, which means you can see a larger area of the slide. The coarse adjustment knob works well in this stage because it helps you quickly locate the specimen.
Once the specimen is centered and visible, you can move to a higher magnification and use the fine adjustment knob for detail.
Function Of The Fine Adjustment Knob
The fine adjustment knob is usually smaller than the coarse adjustment knob. Its function is to make very small changes in focus.
This knob is used when the image is already visible but not sharp enough. Instead of moving the stage a large distance, it moves slowly and precisely, allowing you to improve clarity.
Used For Sharpening The Image
The fine adjustment knob helps sharpen the details of a specimen. After the coarse adjustment knob brings the image into view, the fine knob makes small corrections until the image becomes crisp.
This is especially important when viewing cells, microorganisms, fibers, or prepared slides. Tiny structures can be difficult to see unless the focus is adjusted carefully.
Essential At High Magnification
The fine adjustment knob becomes more important as magnification increases. At 40x objective power, 100x objective power, or 400x total magnification, the depth of focus becomes very narrow.
This means even a tiny movement can make the image clearer or blurrier. The fine adjustment knob gives you the control needed to make those small changes without moving too far.
Helps Protect The Slide And Lens
Because the fine adjustment knob moves slowly, it is safer to use at high magnification. It reduces the risk of crashing the objective lens into the slide.
This is one of the most important microscope safety habits for beginners. Once you switch to a high power lens, avoid using the coarse adjustment knob unless your microscope manual specifically says it is safe.
Fine Adjustment Knob Vs Coarse Adjustment Knob
The fine and coarse adjustment knobs both control focus, but they serve different purposes.
Coarse Adjustment Is For Big Movements
The coarse adjustment knob moves the stage or lens quickly. It is useful when the image is completely out of focus or when you are just starting to view a slide.
Think of it as the “find it” knob. It helps you locate the specimen and get close to proper focus.
Fine Adjustment Is For Small Movements
The fine adjustment knob moves slowly and carefully. It is useful when the specimen is visible but still slightly blurry.
Think of it as the “perfect it” knob. It helps you make the final focus correction so the image becomes clear.
Using Them Together
The correct focusing process usually starts with the coarse adjustment knob and ends with the fine adjustment knob.
You begin at low magnification, use the coarse adjustment knob to find the specimen, then use the fine adjustment knob to sharpen it. After that, you can increase magnification and continue using the fine adjustment knob for clearer detail.

How To Use The Adjustment Knobs Correctly
Using the fine and coarse adjustment knobs correctly can make a major difference in your viewing experience. A simple routine can help prevent frustration.
Start With The Lowest Power Objective
Always begin with the lowest power objective lens, usually 4x. This gives you the widest view and the safest working distance.
Place the slide on the stage and center the specimen over the light opening. Secure the slide with clips or the mechanical stage.
Use The Coarse Adjustment Knob First
Look through the eyepiece and slowly turn the coarse adjustment knob until the image appears. Move carefully and avoid turning too fast.
If you do not see anything, check whether the slide is centered and whether the light is turned on. Many beginners keep turning the focus knob when the real problem is slide position or lighting.
Switch To The Fine Adjustment Knob
Once the specimen appears, stop using the coarse adjustment knob. Turn the fine adjustment knob slowly until the image becomes sharper.
At this point, you may also adjust the light or diaphragm to improve contrast.
Move To Higher Magnification
After the specimen is centered and focused at low power, rotate to the next objective lens. The image may become slightly blurry again, but it should still be close to focus.
Use the fine adjustment knob only to sharpen the image. Avoid using the coarse adjustment knob at high magnification.
Why Images Stay Blurry Even After Focusing
Sometimes users adjust both knobs but still cannot get a clear image. In many cases, the problem is not the knobs themselves.
The Slide Is Not Centered
If the specimen is not centered over the light opening, you may be focusing on an empty part of the slide. Always center the sample before increasing magnification.
The Light Is Too Bright Or Too Dim
Poor lighting can make a focused image look unclear. Too much light may wash out the specimen. Too little light may make it hard to see details.
Adjusting the diaphragm or brightness can improve contrast.
The Objective Lens Is Dirty
Dust, fingerprints, or oil on the lens can create a cloudy image. Clean microscope lenses only with proper lens paper. Do not use regular tissue or your shirt, because they may scratch the lens.
The Sample Is Too Thick
Compound microscopes work best with thin samples that allow light to pass through. Thick samples can appear dark or blurry no matter how carefully you focus.
Common Mistakes Beginners Make
Many microscope focusing problems come from a few repeated habits. Avoiding these mistakes will help you get clearer results.
Starting With High Magnification
Beginners often start with the highest power lens because they want to see more detail right away. This usually makes the specimen harder to find.
Always start low, focus the image, center the specimen, and then increase magnification step by step.
Using The Coarse Adjustment Knob At High Power
This is one of the most common and risky mistakes. At high magnification, the lens is very close to the slide. A large movement can cause contact and damage.
Use the fine adjustment knob at high power unless your microscope has special safety features.
Turning The Knobs Too Quickly
Fast focusing can cause you to pass the correct focus point without noticing it. Move slowly and watch the image carefully as it changes.
Ignoring The Stage Position
Focus will not help if the specimen is not in the viewing area. Before adjusting the knobs too much, make sure the slide is properly positioned.
Adjustment Knobs On Different Types Of Microscopes
Not all microscopes are designed exactly the same, but the focusing concept is similar across many models.
Compound Microscopes
Compound microscopes usually have both fine and coarse adjustment knobs. These models are commonly used for biology slides, cells, and microorganisms.
The two knob system is important because compound microscopes often work at higher magnification.
Stereo Microscopes
Stereo microscopes may have a coarse focusing knob and sometimes a fine focusing control, depending on the model. Since stereo microscopes usually use lower magnification, focusing is often easier and less sensitive.
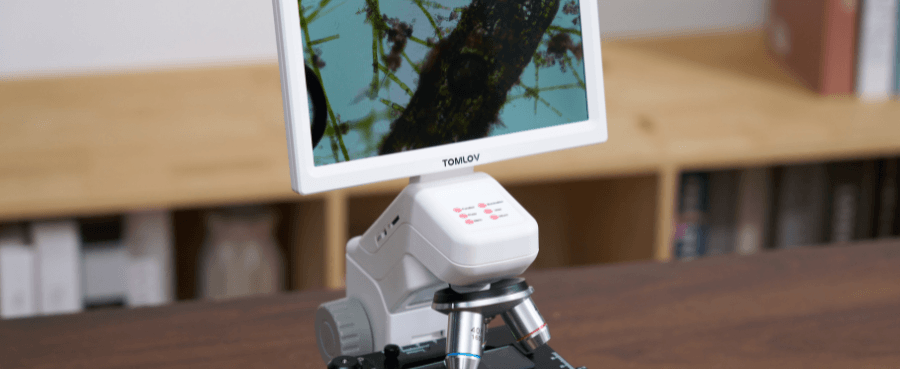
Digital Microscopes
A Digital microscope may use manual focus, digital focus controls, or a combination of both. This can make viewing easier for students, teachers, and hobbyists who want to see the image on a screen, capture photos, record videos, or share observations with others. For users who find eyepiece focusing uncomfortable, a digital model can offer a more convenient viewing experience.
Related Reading: What Is A Digital Microscope And How Does It Work?

Tips For Getting A Clearer Microscope Image
Good focusing depends on more than turning the knobs. A few simple habits can improve image quality.
Keep The Slide Flat And Secure
A loose slide may shift while you focus. Use stage clips or a mechanical stage to hold it steady.
Adjust Light Before Over Focusing
If the image looks pale or washed out, reduce the light or adjust the diaphragm. If the image looks too dark, increase the brightness.
Use Fine Focus Slowly
Small movements matter at higher magnification. Turn the fine adjustment knob slowly and patiently.
Clean The Lens Properly
If the image stays cloudy, check the eyepiece and objective lens. Use lens paper and proper cleaning solution if needed.
Final Thoughts
The fine and coarse adjustment knobs are two of the most important controls on a microscope. The coarse adjustment knob helps you quickly bring the specimen into view at low magnification, while the fine adjustment knob sharpens the image with small, precise movements. For the best results, always start with the lowest power objective, use the coarse knob first, then switch to the fine knob once the specimen is visible. At higher magnification, rely on fine adjustment to protect the slide and lens. Understanding how these knobs work can make microscopy less frustrating and much more rewarding. Whether you are using a microscope in a classroom, lab, or home learning setup, proper focusing technique is the key to seeing clear, detailed images.

Commenta
Nota che i commenti devono essere approvati prima di essere pubblicati.
Questo sito è protetto da hCaptcha e applica le Norme sulla privacy e i Termini di servizio di hCaptcha.