
Table of Contents
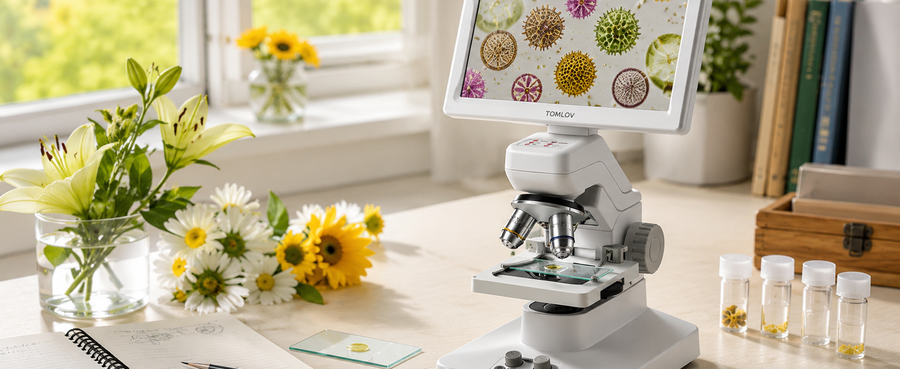
Pollen can look like fine dust to the naked eye, but under a digital microscope it becomes a field of tiny grains with different shapes, textures, colors, and surface patterns. Some grains look round or oval, while others appear spiky, ridged, or irregular. This guide explains what pollen grains look like, which samples are easiest for beginners, how to prepare dry and wet samples, and how to observe them without overinterpreting one small view.
What Do Pollen Grains Look Like Under a Digital Microscope?
Round, Oval, Triangular, or Disc-Shaped Grain Forms
Pollen grains do not all have the same shape. Some look round, some appear oval, and others may look triangular, flattened, or disc-shaped depending on the plant. The shape may also change slightly depending on whether the sample is dry or mounted in liquid.
For beginners, shape is usually the first detail to notice. Start by describing what you see in simple terms: round, long, flat, angular, or irregular.
Spiky, Ridged, Smooth, or Patterned Surfaces
Many pollen grains show surface texture under magnification. Some look smooth, while others may appear covered with ridges, bumps, spikes, or patterned outer surfaces. These surface features can make pollen more interesting than ordinary dust.
Do not expect every grain to look dramatic. Some pollen types are easier to observe than others, and lighting can strongly affect whether the surface detail appears clear.
Insect-Pollinated vs Wind-Pollinated Pollen Clues
Pollen from insect-pollinated plants often has textured, sticky, spiky, or ridged surfaces that help it attach to pollinators. Pollen from wind-pollinated plants is often lighter, smoother, or shaped in ways that help it travel through the air.
This is only a general clue, not a fixed rule. For example, pine pollen may show air-sac-like structures that help it float. Other pollen types may need stronger magnification or better preparation to show clear surface clues.
The Outer Shell: Exine Texture and Visible Surface Detail
The tough outer shell of a pollen grain is called the exine. It helps protect the grain and often carries the surface texture you see under the microscope. In beginner observation, the exine may appear as a rough, patterned, spiky, or smooth surface.
You do not need to study pollen anatomy deeply to enjoy the observation. Focus on visible details: the outline, surface texture, openings, and whether grains appear alone or grouped together.

What Pollen Samples Should Beginners Observe First?
Flower Pollen From Common Garden Plants
Common flowers are the easiest starting point. Sunflowers, lilies, hibiscus, daisies, and similar garden flowers may produce visible pollen that can be collected gently. Choose fresh flowers with obvious pollen on the anthers.
Avoid collecting too much at once. A tiny amount is enough for several microscope views.
Dry Pollen Collected on Paper or Tape
Dry pollen is easy to collect. Tap the flower gently over clean paper, or touch transparent tape lightly to the pollen-bearing part of the flower. A dry sample can show grain clumps, dust-like particles, and surface texture.
Tape is convenient, but it can also add glare or bubbles. Paper collection gives you more control when moving a small amount onto a slide or dark background.
Fresh Samples That Are Easy to Label and Compare
Fresh samples are easier to compare when you label them clearly. Write down the flower name if known, the collection date, and whether the sample is dry or mounted in liquid.
Here is a simple comparison table for beginner pollen samples:
|
Sample Type |
What It May Show |
Beginner Tip |
|
Garden flower pollen |
Color, grain clusters, surface texture |
Start with flowers that have visible pollen |
|
Dry pollen on paper |
Loose grains and clumps |
Use a tiny amount to avoid crowding |
|
Tape-lifted pollen |
Grains held in place |
Watch for glare from the tape |
|
Pine or similar pollen |
Possible air-sac-like structures |
Compare several grains before describing shape |
Pine or Similar Pollen for Air-Sac-Like Structures
Pine pollen can be especially interesting because some grains may show paired air-sac-like structures. These can make the grain look different from round flower pollen.
Not every grain will sit in the perfect position, so view several grains before describing the sample. Rotate the slide or move across the sample slowly to find clearer examples.
How Do You Prepare and View Pollen Under a Digital Microscope?
Use a Digital Microscope With Adjustable Top and Bottom Lighting
Pollen can be viewed as a dry surface sample or as a wet mount. Top lighting helps reveal surface texture, while bottom lighting can help with translucent details in a slide-mounted sample.
For beginners, a digital microscope for specimen observation can make pollen easier to view because you can adjust the sample and lighting while watching the image on a screen.
Try a Dry Sample Before Making a Wet Mount
Start with dry pollen first. Place a tiny amount on a clean slide, dark card, or plain background. Dry samples are simple and help you see grain clusters, surface texture, color, and dust-like particles.
The main challenge is that dry pollen can scatter easily. Use a very small amount and avoid breathing directly over the sample.
Use Water or Glycerin to Reveal Clearer Grain Shapes
A wet mount can make some pollen grains easier to separate and view. Place a tiny amount of pollen on a slide, add one small drop of distilled water or glycerin, then lower the cover slip gently.
Water is simple and works for short observations. Glycerin can slow drying and may help keep the sample stable longer. Do not use too much liquid, or the grains may drift out of focus.
Start at Low Magnification to Find the Grains
Begin at low magnification so you can find the pollen grains and see whether the sample is too crowded. Look for small rounded, oval, or irregular grains rather than large fibers, bubbles, or plant fragments.
Once you locate a clear area, move closer gradually. A wider view helps you choose better grains before spending time on fine details.
Adjust Focus Because Pollen Grains Are Three-Dimensional
Pollen grains are not flat. They have depth, so one focus level may show the top texture while another shows the outline or middle area of the grain. Refocus slowly instead of trying to make every part sharp at once.
When comparing several pollen samples, screen viewing can make small focus and lighting changes easier to judge. The TOMLOV DM301 Pro digital microscope works well for this kind of beginner observation because it combines a built-in screen, adjustable top and bottom lighting, and photo or video capture for saving reference images.
Use Top Lighting for Surface Texture and Bottom Lighting for Translucent Detail
Top lighting is useful for dry pollen because it highlights surface ridges, bumps, and shadows. Bottom lighting is more useful for thin wet mounts because light passes through the slide and can make translucent shapes easier to see.
Try both if your setup allows it. If the grain looks too dark, adjust the background or lighting before increasing magnification.
Increase Magnification to See Shape, Ridges, and Surface Texture
After finding clear grains, increase magnification gradually. Look for outline, texture, ridges, spikes, openings, and whether grains appear single or clumped.
Do not use the highest setting first. A clear medium-magnification image is often more useful than a blurry close-up.
Save Images Before Moving to Another Sample
Save photos before changing slides, lighting, or sample type. Capture one wider image showing the overall sample, then one closer image showing grain shape and surface detail.
When comparing pollen from several flowers, clearer saved images make it easier to review differences later. A 4K digital microscope can be useful when your goal is to compare pollen shapes, textures, and color changes across multiple samples.

What Mistakes Should Beginners Avoid?
Do Not Assume Every Yellow Particle Is Pollen
Not every yellow or dusty particle is pollen. Flower samples may include dust, broken plant material, fibers, and tiny debris. Some particles may look pollen-like at first but lack consistent grain shape or surface texture.
Compare several particles before describing the sample. True pollen grains usually show repeated shapes within the same sample.
Don’t Guess the Plant Species Based on a Single Grain
Pollen can provide useful visual clues, but one grain is not enough to identify a plant species with confidence. Shape, size, texture, and surface pattern can vary, and many plants require expert comparison.
Use beginner observations to describe what you see, not to make final species-level claims.
Do Not Use Too Much Water on a Wet Mount
Too much water can make pollen grains drift, overlap, or move out of focus. It can also lift the cover slip and create bubbles.
Use one small drop first. If the slide dries, add a tiny amount near the cover slip edge rather than flooding the sample.
Allergy Precautions: How to Handle Pollen Safely
Pollen can trigger allergies in some people. If you have strong pollen allergies, avoid handling fresh pollen directly. Wear gloves, keep samples small, and wash your hands after the activity.
Do not blow on pollen or scatter it indoors. Keep samples covered when possible and clean the workspace after observation.
Conclusion
Pollen under a digital microscope can reveal shapes, textures, colors, clumps, and surface patterns that are invisible to the naked eye. Some grains look smooth and round, while others appear spiky, ridged, triangular, or attached in clusters.
For the best results, start with an easy flower sample, try dry observation first, then prepare a simple wet mount if needed. Use low magnification to locate grains, adjust focus carefully because pollen is three-dimensional, and save images before changing samples.
FAQs
What Magnification Is Needed to See Pollen?
Pollen grains can often be seen at low to medium magnification, but more detail appears as you increase magnification gradually. Start low to find the grains, then move closer to inspect shape, surface texture, and clumping. Clear lighting and a well-prepared sample matter more than using the highest magnification immediately.
How Do You Identify Pollen?
You can make a beginner-level identification by comparing grain shape, size, surface texture, and whether the grains appear smooth, spiky, ridged, or clumped. However, pollen identification can be complex, and one home microscope sample is not enough for reliable species-level identification. Use your observations as visual clues, not final proof.
Is Pollen White or Yellow?
Pollen is often yellow, but it can also appear white, cream, orange, red, brown, or other colors depending on the plant. Under a microscope, the visible color may also change with lighting, background, sample thickness, and whether the pollen is dry or mounted in water.
Is There Pink Pollen?
Yes, some plants can produce pollen that appears pink, reddish, or purple-toned, although yellow and cream-colored pollen are more common. Color alone is not enough to identify pollen. Under a microscope, focus on the grain’s shape, size, surface pattern, and how the grains group together.

发表评论
所有评论在发布前都会经过审核。
此站点受 hCaptcha 保护,并且 hCaptcha 隐私政策和服务条款适用。