
Table of Contents
A mint error happens before or during the coin-striking process. Post-mint damage happens after the coin has already been struck. That timing matters because real mint errors usually follow the logic of dies, planchets, rims, strike pressure, and metal flow. Damage usually cuts, flattens, bends, scratches, or disrupts the finished surface. A coin microscope can help you inspect small details clearly, but it should support careful comparison, not replace expert authentication.
What Is the Difference Between a Mint Error and Post-Mint Damage?
Mint Errors Happen Before or During the Final Strike
Mint errors are connected to how the coin was made. They may involve the blank planchet, die, collar, strike alignment, or minting pressure. Die cracks, die chips, cuds, off-center strikes, broadstrikes, and clipped planchets are common examples. The feature should make sense as part of the minting process.
Post-Mint Damage Happens After the Coin Is Struck
Post-mint damage happens after the design is already on the coin. Scratches, dents, gouges, corrosion, polishing, drilling, bending, and scrape marks are typical examples. These marks usually interrupt the original surface rather than form naturally with the strike.
Minting Pressure and Outside Force Leave Different Clues
Minting pressure moves metal in a structured way. Even when something goes wrong, the result often follows the rim, die, lettering, or strike pattern. Outside force is usually more random. A scratch may cut across several design areas, while a dent may flatten both the field and raised design.

How Should You Check a Suspected Error Under a Coin Microscope?
Scan the Whole Coin at Low Magnification
Start with the whole coin, not the suspicious mark. Check the date, mint mark, rim, edge, design position, and surface condition first. A coin microscope can help beginners inspect lettering, rims, raised details, flattened areas, and small surface marks while keeping the coin in context.
Zoom In Only After Finding a Suspicious Area
High magnification can make tiny scratches, stains, or corrosion spots look more important than they are. Find the suspicious area at low magnification first, then zoom in gradually. Refocus and adjust lighting each time. A real feature should still make sense at different viewing levels.
Inspect the Date, Mint Mark, and Lettering
Dates, mint marks, and lettering are common places to notice possible errors. Look for unusual doubling, filled areas, raised extra metal, weak details, or cuts through the design. Raised details and sunken marks should be judged differently because they often suggest different causes.
Compare Raised, Sunken, and Flattened Details
A raised line may suggest a die crack. A sunken line is more likely to be a scratch. Flattened areas may come from wear, pressure, or impact after striking. Compare the suspicious detail with the surrounding metal instead of judging the mark alone.
Check Rims, Edges, and High Points
Rims and edges can reveal whether the coin was struck unusually or damaged later. Real striking errors often affect the overall layout or rim formation. Later damage may leave cuts, nicks, dents, or bends. High points also wear first, so smooth detail is not automatically an error.
Save Clear Photos From More Than One Angle
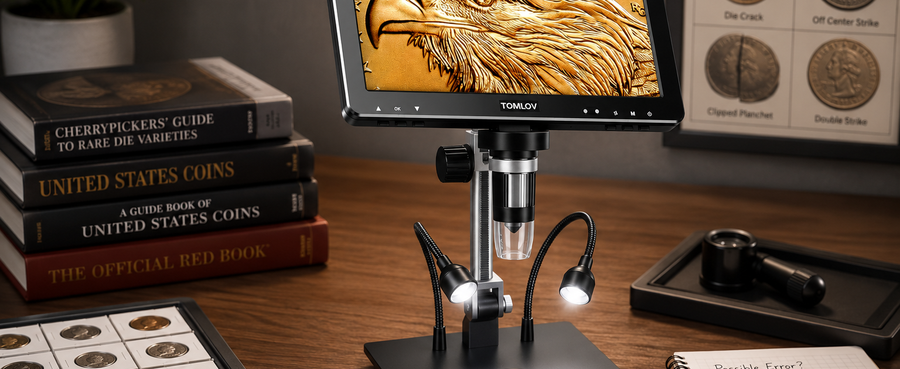
Take photos from more than one angle and lighting direction. A scratch may look strong under one light angle and nearly disappear under another. For collectors who document coins regularly, the TOMLOV DM9 Max digital microscope fits this step because the task is to record both full-coin context and close-up details.
What Signs May Suggest a Real Mint Error?
Raised Die Cracks, Chips, or Cuds
Die cracks often appear as raised lines because metal flows into a crack in the die during striking. Die chips and cuds may appear as raised blobs or connected raised areas. If the feature is cut into the coin instead, it is more likely to be damage.
Off-Center Strikes and Broadstrikes
An off-center strike affects the overall design position. Part of the design may be missing while blank space remains visible. A broadstrike may make the coin look wider because it was struck without proper collar restraint. These errors affect the whole layout, not just one tiny mark.
Clipped Planchets and Missing Areas
A clipped planchet starts with the blank before striking. The missing area should relate to the blank’s original shape, not look like a fresh cut or tool mark. Compare the edge texture, curve, and nearby design before assuming the missing area is a real planchet error.
Repeated Patterns on Known Error Types
Real mint errors usually match known patterns. A die crack, clipped planchet, or off-center strike should resemble confirmed examples in structure, not just look unusual. One odd mark is not enough. The stronger case is one that matches a recognized minting process.

What Signs Usually Point to Post-Mint Damage?
Scratches, Gouges, and Scrape Marks
Scratches and gouges are usually sunken into the surface. They may cut across portraits, lettering, fields, and rims without following the coin’s design. Under magnification, sharp edges, torn metal, or broken surfaces strongly suggest post-mint damage.
Flattened, Bent, or Distorted Surfaces
Outside pressure can flatten raised details or bend the coin. If both the raised design and surrounding field are pushed down together, the cause is likely impact or pressure after striking. Do not confuse this with a weak strike unless the rest of the coin supports that explanation.
Cut, Drilled, Corroded, or Polished Areas
Cuts, drill marks, corrosion, and polishing are not mint errors. Corrosion may create pits or rough texture. Polishing can make the surface unnaturally shiny and remove fine detail. These marks can look dramatic under magnification, but dramatic does not mean valuable.
Random Marks That Break the Coin’s Original Surface
Post-mint damage often looks random. It may cross the design at odd angles, interrupt several features, or create inconsistent texture. If the mark looks scraped, hit, cleaned, corroded, or altered after use, it is more likely damage than a mint error.
How Should You Compare a Possible Error With Known Examples?
Use Trusted Error Coin References
Use reliable coin references, grading service examples, and clear photos of confirmed errors. Social media can help with discussion, but it should not be your only source. Look for the same error type and similar structure, not just another coin that looks strange.
Compare the Same Coin Type, Date, and Mint Mark
Compare your coin with the same denomination, design, date, and mint mark when possible. Some details that look unusual may be normal for that issue. Different coins have different relief, lettering, rims, and wear patterns.
Look for Consistent Patterns, Not One Odd Mark
A possible error becomes more convincing when several clues point in the same direction. Check whether the feature is raised or sunken, strike-related or surface-breaking, repeated in references or isolated to one damaged spot. This prevents overcalling damage as an error.
What Should You Avoid When Checking a Possible Error Coin?
Do Not Clean the Coin
Do not clean a possible error coin, even if the surface looks dirty or stained. Cleaning can add fine scratches, remove original surface texture, change the coin’s color, and make later evaluation harder. A cleaned surface may also hide the original clues you need to compare. Handle the coin by the edges, place it in a safe holder, and document the surface with clear photos instead.
Do Not Assume Unusual Means Valuable
Many damaged coins look unusual under magnification. A strange mark, stain, dent, scrape, or flattened area may catch your attention, but that does not automatically make it rare or valuable. Value depends on error type, condition, demand, and whether the feature matches a recognized minting pattern.
Do Not Rely on One Blurry Microscope Image
One blurry close-up can lead to the wrong conclusion. A tight image may make a scratch look like a die crack or make ordinary wear look more dramatic. Take clear photos of the whole coin first, then capture the suspicious area from more than one angle.
For collectors comparing several coins or suspected errors, a 4K digital microscope can help keep clearer visual records of raised, sunken, and flattened details for later review.
Do Not Skip Professional Review for Valuable Coins
For a coin that may be rare, valuable, or difficult to judge, consider professional review. A microscope can help you document visible clues, but it cannot replace expert authentication or grading. This matters more for expensive coins, unusual errors, or pieces that may have been altered.
Conclusion
The difference between a mint error and post-mint damage comes down to timing and cause. Mint errors fit the logic of planchets, dies, strikes, rims, and metal flow. Post-mint damage usually cuts, flattens, bends, polishes, corrodes, or disrupts the finished surface. Start low, inspect the whole coin, compare raised and sunken details, photograph the suspicious area, and check trusted examples before making a decision.
FAQs
Can You Look at Coins Under a Microscope?
Yes. A microscope can help inspect dates, mint marks, lettering, rims, scratches, die cracks, and small surface details. Start at low magnification so the feature stays in context, then zoom in only after finding a specific area worth checking.
How Do You Verify a Possible Mint Error Coin?
Photograph the whole coin and the suspicious area, then compare it with trusted examples of the same coin type, date, and mint mark. Look for features that match a known minting process. For valuable coins, professional authentication is safer than relying only on photos.
What Does a Mint Mark Error Look Like?
A mint mark error may involve unusual doubling, repunching on older coins, filling, or die-related distortion. Many apparent mint mark issues are actually scratches, wear, weak detail, or corrosion. Check whether the feature is raised, sunken, and consistent with known examples.
What Does a Planchet Error Look Like?
A planchet error involves the blank before striking. It may show a clipped area, lamination flaw, or wrong-planchet issue. The unusual area should make sense as part of the blank’s formation. Fresh cuts or random missing metal usually suggest post-mint damage.
Is There an App That Identifies Coin Errors?
Some apps can help identify coin type or provide basic reference information, but they cannot reliably confirm mint errors or value. Error identification requires careful inspection, comparison with known examples, and sometimes expert review. Use apps as a starting point, not a final answer.


发表评论
所有评论在发布前都会经过审核。
此站点受 hCaptcha 保护,并且 hCaptcha 隐私政策和服务条款适用。