Table of Contents
If you've recently picked up a coin microscope, or you've had one sitting on your desk without fully using it, this guide is for you. Owning a coin microscope is one thing; knowing how to squeeze every bit of value out of it is another. Here's how to actually make it work for you.
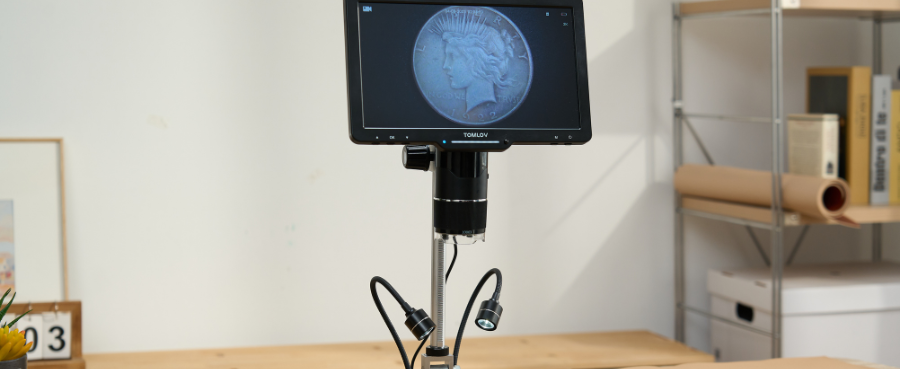
Set Up Your Coin Microscope the Right Way First
Most collectors unbox their microscope, plug it in, and start looking at coins immediately. That works, but a proper setup makes a surprisingly big difference in image quality and usability.
Choose the Right Surface and Position
Place your microscope on a solid, stable surface away from foot traffic and vibration sources like HVAC units or washing machines. Even small vibrations translate into blurry images at higher magnification. A heavy wooden desk works far better than a lightweight folding table.
Height matters too. Position the microscope at a comfortable eye level so you're not hunching over the screen. If your model connects to a monitor or computer rather than a built-in display, set your screen at arm's distance directly in front of you. Neck strain is a real issue during long examination sessions.
Get Your Lighting Right for Coins
This is where most beginners go wrong. The default setting on most coin microscopes, which is full brightness LED ring light, is actually not ideal for coin surfaces. Flat, even illumination washes out the fine details you're trying to see.
For examining coin surfaces, try raking light: reduce the LED brightness significantly and position any adjustable light source to hit the coin from a low, oblique angle. This side lighting creates shadows in the tiny imperfections on the coin's surface, making hairlines, luster flow, and die details far more visible. If your microscope has adjustable LED segments, experiment with turning off one side entirely.

Master Magnification Levels for Different Tasks
One of the biggest mistakes collectors make is defaulting to the highest magnification available. More zoom isn't always better, and each magnification range has a specific job.
Low Magnification (10x–30x): Quick Condition Checks
Start here for any new coin. At this range you get a wide field of view that lets you assess overall condition quickly, including obvious wear, major contact marks, signs of cleaning, or any surface damage. This is also where you confirm details like date numerals and denomination on worn coins. Think of this as your first pass, not your final verdict.
Mid Magnification (40x–100x): Mint Marks and Die Varieties
This is the sweet spot for serious coin work. At 40x–100x, mint marks come into sharp focus, and you can start spotting repunched mint marks (RPMs), doubled dies, and other die varieties listed in reference guides like the Cherrypickers' Guide. Most attribution work happens in this range. If you're evaluating a coin before submission to a grading service, spend most of your time here. This is where cleaning, hidden hairlines, and strike quality become fully apparent.
High Magnification (100x+): Surface Texture and Fine Details
At this level, depth of field becomes very shallow, so you'll need to adjust focus carefully as you move across the coin's surface. This range is most useful for distinguishing original mint surfaces from altered ones, examining proof-quality coins, or checking for very fine signs of tooling or re-engraving. It's not necessary for every coin, but when you need it, nothing else comes close.
Related Reading: Coin Microscope vs. Handheld Magnifier: Which Is Better for Coin Collecting?
Know What You're Actually Looking For
Coin microscopes show you everything, but knowing what to look for is what turns magnification into real discovery. Two areas deserve the most attention.
Spotting Hairlines and Cleaning Damage
Cleaning is one of the most value-destroying things that can happen to a collectible coin, and it's often invisible to the naked eye. Under magnification, a cleaned coin shows fine parallel lines (hairlines) running across the fields, the result of being wiped with a cloth or polished. Luster on a genuine uncirculated coin flows in a cartwheel pattern from the center. On a cleaned coin, that natural luster is gone and the surface looks flat or artificially bright.
Learning to recognize this distinction is one of the most valuable skills a collector can develop, and it's essentially impossible without a coin microscope.
Identifying RPMs, Doubled Dies, and Error Coins
Error coins are where a coin microscope really earns its place. Repunched mint marks, where the mint mark was stamped more than once slightly off position, are only detectable under magnification. The same goes for doubled die varieties, where design elements show a clear doubling or offset. These details can make the difference between a common date worth face value and a coin worth hundreds or thousands of dollars. A 1955 doubled die Lincoln cent, a 1916-D Mercury Dime, or any number of RPM varieties on Morgan dollars all require close examination to confirm.
Use the Camera Features — Don't Just Look
A digital coin microscope isn't just a magnifier. The camera is one of its most powerful features, and many collectors barely use it.
Build a Photo Archive of Your Collection
Take photos of every significant coin in your collection, both obverse and reverse, at your standard examination magnification. Store them organized by date, denomination, and grade. This archive is invaluable for insurance purposes, tracking any condition changes over time, and having documentation if you ever sell. Photos taken under consistent lighting also give you a reliable baseline to compare against if questions about authenticity arise later.
Compare Images to Reference Guides
The ability to capture a still image and hold it next to a variety plate in a reference book is a genuine game-changer for attribution work. When you're trying to confirm whether a Lincoln cent is a 1914-D or an altered date, or whether your Morgan dollar carries a specific RPM listed in VAM World, being able to freeze and zoom into a photo rather than trying to look through the eyepiece and flip pages simultaneously makes attribution far more accurate and far less frustrating.

Common Mistakes Collectors Make With a Coin Microscope
Even experienced collectors fall into a few habits that limit what they get out of their equipment.
Jumping straight to high magnification is the most common one. Always start low and work up. You'll often find what you need at 30x–50x, and starting high means you might miss important contextual details.
Touching coins with bare hands is another. Skin oils leave fingerprints that are plainly visible under magnification and can damage coin surfaces over time. Always use cotton gloves or handle coins by their edges.
Ignoring the background costs more than people realize. A dark, non-reflective pad under the coin, with black velvet being a popular choice, dramatically improves image contrast compared to a shiny or bright surface. Most coin microscope setups don't include one, but it's an easy and inexpensive addition.
Not saving images as you work is a habit worth breaking early. It's easy to forget what you saw on a coin you examined three days ago. Get into the habit of capturing images during every session, even quick ones.
Finally, comparing everything to online photos leads collectors astray more than any other single habit. Online coin images vary wildly in quality, lighting, and magnification. When doing serious attribution work, invest in printed reference materials. Your microscope's camera output paired with a physical variety guide is a far more reliable combination than matching your image against a random forum photo.
Final Thoughts
A coin microscope doesn't make you a better collector overnight, but used consistently and deliberately, it changes what you're capable of seeing, and therefore what you're capable of finding. The collectors who get the most out of theirs aren't necessarily the ones with the most expensive equipment. They're the ones who take the time to set it up properly, understand what each magnification level is for, and build good habits around documentation and lighting.
Whether you're searching roll after roll for error coins, attributing die varieties on classic US silver, or simply wanting to know the true condition of a coin before you buy or sell, a coin microscope gives you the tools to do all of it with confidence. The learning curve is short. The payoff, especially the first time you spot a doubled die or catch a cleaned coin that fooled everyone else, is very much worth it.

Laisser un commentaire
Tous les commentaires sont modérés avant d'être publiés.
Ce site est protégé par hCaptcha, et la Politique de confidentialité et les Conditions de service de hCaptcha s’appliquent.