
Table of Contents
Moving a precision optical instrument incorrectly can easily misalign delicate internal components or cause permanent physical damage. This guide details the exact steps required to handle, transport, and store both traditional and digital microscopes safely. Mastering these fundamental handling techniques will protect your valuable equipment and ensure crystal-clear optical performance for years.
Why Proper Microscope Handling Matters
A microscope is not a solid block of metal; it is a highly sensitive arrangement of precisely aligned glass and electronic sensors. Treating it with care is essential for maintaining its functionality.
Prevent Damage to Optical Components
The internal lenses and mirrors rely on exact alignment to produce a sharp image. Jarring movements, swinging the device, or setting it down too heavily can knock these optical components out of alignment. Once misaligned, the microscope will produce blurry, distorted images that cannot be fixed by simply adjusting the external focus knobs.
Reduce the Risk of Accidents
Microscopes are heavy and often top-heavy. Carrying one carelessly dramatically increases the risk of bumping into door frames, snagging cords on tables, or simply dropping the instrument. A dropped microscope almost always results in shattered objective lenses and broken mechanical stages, leading to incredibly expensive repairs.
Extend the Microscope’s Lifespan
Consistent, careful handling directly extends your equipment's working life. By carrying it properly, you avoid stressing the mechanical joints, wearing out the rack and pinion focusing gears, and straining the electronic connections, protecting your financial investment over the long term.
What to Do Before Moving a Microscope
Safe transportation begins before you even lift the instrument off the desk. Proper preparation prevents loose parts from becoming dangerous projectiles.

Remove Slides and Loose Accessories
Never move a microscope with a glass slide still sitting on the stage. The slide will easily slide off and shatter on the floor, creating a severe safety hazard and potentially ruining your specimen. Remove all slides, loose filters, and detachable tools from the viewing platform before lifting the device.
Lower the Stage and Secure the Objective
Use the coarse focus knob to lower the mechanical stage completely. Next, rotate the nosepiece so that the lowest power objective lens (usually the 4x) is pointing straight down over the stage opening. This configuration creates the maximum amount of physical clearance between the stage and the lenses, preventing them from violently crashing into each other during transit.
Turn Off Power and Disconnect Cables
Leaving cables plugged in creates an immediate tripping hazard. Turn the power switch off completely. Unplug the main power cord from the wall, and then unplug it from the back of the microscope. Neatly wrap the cord and carry it separately rather than letting it drag on the floor behind you.
How to Carry a Microscope Correctly
The physical act of lifting and walking with a microscope requires a specific, two-handed technique that guarantees stability.
Hold the Arm With One Hand
The structural backbone of the microscope is the solid metal arm that connects the base to the upper lenses. Grip this arm firmly with your dominant hand. This hand serves as your primary lifting point and provides the main stabilizing force while you walk.
Support the Base With Your Other Hand
Never lift a microscope using only one hand. Slide your other hand entirely underneath the flat, heavy bottom base of the instrument. This bottom hand acts as a secure physical shelf, supporting the majority of the device's weight and preventing it from swinging like a pendulum.
Keep the Microscope Upright While Moving
Always keep the microscope completely vertical while walking. If you tilt the instrument horizontally, the expensive glass eyepieces—which are often resting loosely inside the optical tubes—can slide completely out and shatter on the floor. Keeping the unit perfectly upright ensures gravity holds all loose components safely in place.
How to Transport a Digital Microscope Safely
Digital models lack traditional optical eyepieces but introduce delicate electronic screens and camera housings that require special attention during transit.
Protect the Screen and Camera Module
Large LCD screens are highly vulnerable to scratching and cracking. When carrying a digital unit, ensure the screen is folded flat against the arm if the model allows it. Avoid pressing your hands or fingers directly against the delicate glass of the display monitor or the downward-facing digital camera sensor.
Manage Cables and External Devices
Digital setups often involve external HDMI cords, USB power cables, and wired remote controls. Disconnect all external devices entirely before moving. Trying to carry a digital microscope while juggling a handful of loose, dangling cables greatly increases the chance of snagging a cord and pulling the entire unit out of your hands.
Use Proper Storage During Travel
If you need to transport the digital microscope outside of a building, carrying it by hand is no longer sufficient. Always use the manufacturer's original padded box or a dedicated hard-shell carrying case with custom foam inserts. This protects the sensitive electronic boards and digital monitors from vehicular vibrations and sudden impacts.
How to Place and Store a Microscope After Moving
How you set the instrument down is just as important as how you pick it up. Proper placement ensures the microscope is ready for immediate use next time.
Put It on a Stable Surface
Gently lower the base flat onto a sturdy, level desk or laboratory bench. Never place the microscope near the very edge of a table where an accidental bump could knock it over. Ensure the surface does not vibrate from nearby heavy machinery, as this will ruin your high-magnification image stability.
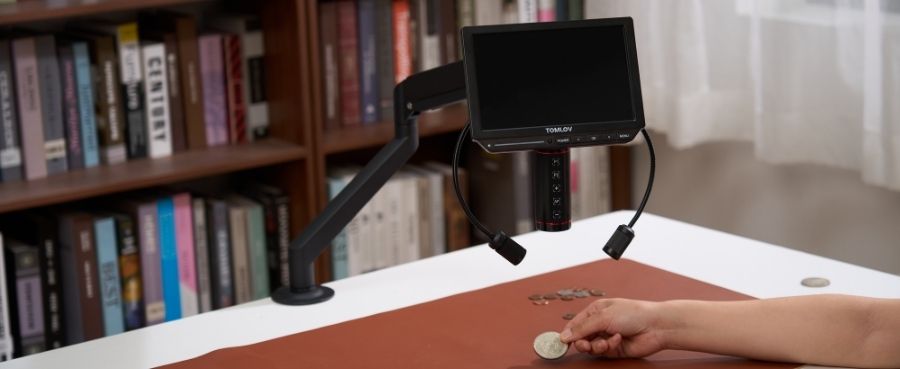
For users who frequently move microscopes between workspaces, a digital microscope can provide added convenience because the built-in camera and display system reduce the need for separate viewing equipment. The TOMLOV Autofocus 4K Digital Microscope TM4K-AF is a practical option for workspaces that require flexible setup, featuring autofocus capability, 4K imaging, and an HDMI connection for real-time viewing on a larger screen. It allows users to inspect samples, capture images, and share observations more easily without relying on a traditional eyepiece system.

Keep Lenses Clean and Protected
Once the microscope is situated, double-check that the lowest power objective is still locked in place over the stage. If your eyepieces have protective plastic caps, place them over the lenses immediately. This simple habit prevents airborne dust and natural oils from settling directly onto the highly sensitive optical glass.
Cover the Microscope When Not in Use
Dust is the absolute worst enemy of precision optics. When you are finished viewing, always drape a specialized vinyl or plastic dust cover over the entire instrument. Keeping the device completely covered prevents microscopic debris from infiltrating the focus gears, settling on the camera sensor, or clouding the internal mirrors.
Conclusions
Treating your microscope with deliberate care prevents costly accidents and preserves optical clarity. By always utilizing the two-handed carrying method, securing all loose components before moving, and protecting the lenses from environmental dust, you guarantee that your equipment remains in perfect working condition. Adopting these basic handling habits ensures your digital microscope is always ready to deliver pristine, high-resolution views of your specimens.
Frequently Asked Questions About Carrying a Microscope
Which two parts should be held when carrying the microscope?
You must always hold the microscope by its structural arm and its solid base. Grip the vertical arm firmly with one hand to stabilize the unit, and place your entire other hand flat beneath the heavy base to support its weight.
How should a microscope be handled?
It should be handled with deliberate care, utilizing two hands at all times. It must be kept completely upright during transit, set down gently on flat, sturdy surfaces, and kept meticulously clean and covered when not in active use.
What are the three rules in carrying a microscope?
The three golden rules are: always use two hands (one on the arm, one under the base), keep the instrument perfectly upright to prevent loose eyepieces from falling out, and completely clear your walking path of tripping hazards before you begin moving.
Should you carry a microscope with both hands?
Yes, absolutely. Attempting to carry a heavy, precision optical instrument with only one hand is incredibly dangerous and invites a high risk of dropping it or throwing the internal optics severely out of alignment.
How do you move a digital microscope safely?
To move a digital microscope safely, first unplug and completely remove all USB, HDMI, and power cables. Support the base and the stand firmly, taking special care not to press your fingers against the fragile LCD monitor or the exposed camera lens during transport.

Laisser un commentaire
Tous les commentaires sont modérés avant d'être publiés.
Ce site est protégé par hCaptcha, et la Politique de confidentialité et les Conditions de service de hCaptcha s’appliquent.