
Table of Contents
Achieving a crystal-clear microscopic image relies entirely on the precise physical distance between your lens and your specimen. This guide explains how stage height directly controls optical focus. You will learn how to safely adjust working distances for both flat slides and bulky materials to guarantee perfect clarity.
What Is Microscope Stage Height Adjustment?
Where It Sits on the Microscope
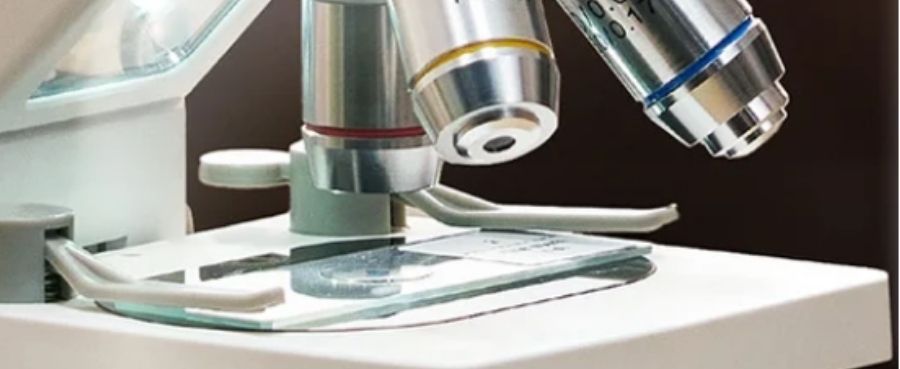
The stage is the flat platform positioned directly beneath the optical lenses. Its height is controlled by mechanical knobs located on the lower arm of the microscope, allowing the entire platform to travel vertically along a geared track.
How Stage Height Differs From Focus Adjustment
While people often use the terms interchangeably, stage height refers to the physical vertical position of the platform. Focus is the resulting optical clarity achieved when that physical height perfectly matches the specific focal length of your objective lens.
Why Proper Stage Height Matters for Clear Images
Lenses possess a very narrow band of space where light converges to form a sharp image. If the stage holds your specimen even a fraction of a millimeter above or below this precise optical band, the resulting image will be completely blurred.
How Stage Height Affects Microscope Focus
Finding the Correct Working Distance
Working distance is the physical gap between the bottom of your lens and the top of your sample. Adjusting the stage height establishes this critical gap. Finding the correct height ensures your sample is in focus without physically crashing into the delicate optical glass.
Adjusting Height for Different Magnifications
As you increase magnification, the required working distance shrinks dramatically. A low-power lens allows for a large gap, while a high-power lens requires the stage to be raised until the sample is almost touching the glass, demanding extreme precision.
Maintaining Focus When Viewing Different Samples
Every object has a unique physical thickness. Swapping a flat piece of paper for a thick coin immediately pushes the top surface of the new sample out of the optical focal plane, requiring you to lower the stage to re-establish a clear image.

How to Adjust Microscope Stage Height Correctly
Start With the Lowest Magnification
Always begin your observation using your lowest-power objective. This lens offers the largest working distance and the deepest focal range, making it incredibly easy and safe to find your initial stage height without risking equipment damage.
Use Coarse Adjustment to Set Initial Height
While looking at the microscope from the side, turn the large coarse adjustment knob to raise the stage until the specimen is close to the lens. Then, look through the screen or eyepieces and slowly lower the stage until the image colors and outlines become visible.
Switch to Fine Focus for a Sharp Image
Once the general outline is visible, stop using the coarse controls. Switch entirely to the smaller fine adjustment knob to make microscopic vertical movements. This locks in the absolute highest level of clarity and crispness.
Adjust Stage Height for Different Microscope Samples
Preparing Thin Slides for Observation
When viewing biological cross-sections or liquids mounted on glass slides, the stage must generally be raised quite high. Because the slide is flat and uniform, establishing the correct height once usually keeps the entire specimen in focus as you pan around.
Viewing Thick Objects With More Working Space
Inspecting bulky items like rocks, insects, or jewelry requires dropping the stage significantly lower. You must establish a baseline height that accommodates the tallest peak of the object to ensure it does not scrape against the objective lens as you move it.
Adjusting Height for Electronics and Materials
Soldering or inspecting circuit boards demands a massive amount of physical clearance to fit your hands and tools. You must lower the stage drastically and rely on specialized low-magnification lenses that are explicitly designed to focus from several inches away.
Choosing a Microscope With Better Stage Height Adjustment
Look for Adjustable Stands and Stable Movement
A high-quality stand is essential for clear imaging. Look for heavy metal bases and rack-and-pinion gearing. If the stage wiggles or drifts downward under its own weight after you set the height, you will constantly lose your focus.
Consider Working Distance for Your Applications
Match the physical height capabilities of the stand to your daily tasks. If you work with large mechanical parts, you need a tall vertical pillar that allows the stage or camera housing to travel several inches up and down.
Choose Features Based on Your Sample Types
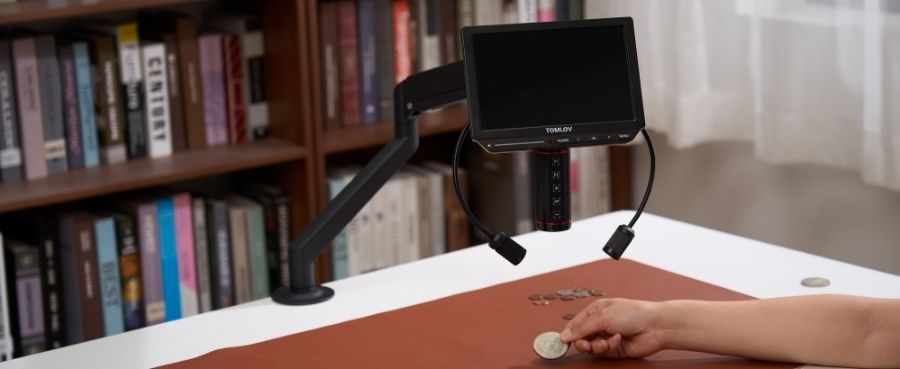
Digital inspection setups often require flexible height clearance to accommodate both flat stamps and thick electronics. For example, the Tomlov DM301 Pro Digital Microscope utilizes a stable vertical stand combined with a 7-inch digital screen, allowing you to easily adjust the physical clearance for bulky items while maintaining sharp, accessible optical focus on the display.

Conclusions
Mastering your microscope’s stage height is the foundational skill for achieving sharp, professional-grade images. By understanding how physical working distance interacts with optical focus, you can safely navigate different magnifications and sample types. lways start at low power, use your coarse and fine adjustments methodically, and prioritize a stable stand when configuring a digital microscope to ensure your daily observation workflow is efficient and entirely frustration-free.
FAQs
Can you use the coarse adjustment for the 40X or 100x objectives?
No. High-power objectives sit incredibly close to the specimen. Turning the large coarse adjustment knob at these magnifications can easily drive the glass slide straight into the objective lens, shattering the slide and permanently scratching your expensive optics.
When should you use the fine adjustment knob?
You should use the fine adjustment knob only after you have found the general image using the coarse focus on low power, or whenever you are actively viewing a sample through high-power objective lenses.
What's the difference between a fine adjustment knob and a coarse adjustment knob?
The coarse knob moves the stage in large, visible vertical increments for rapid positioning. The fine knob moves the stage in microscopic, nearly invisible increments to dial in exact optical clarity.
Why does my microscope lose focus when I move the stage?
If you lose focus when moving the mechanical stage left or right, your sample is likely not perfectly flat, or your glass slide is resting unevenly on the platform. As the thicker or thinner parts of the specimen move into the light path, they fall outside your established vertical focal plane.

Dejar un comentario
Todos los comentarios se revisan antes de su publicación.
Este sitio está protegido por hCaptcha y se aplican la Política de privacidad de hCaptcha y los Términos del servicio.