Table of Contents
Yes, you can connect your digital microscope to a computer, and it's easier than you might think. Whether your device uses a simple USB cable, a wireless Wi-Fi connection, or a high-speed Ethernet port, this guide will show you how. Let's get your magnified view onto the big screen.
To give you a quick overview, here's a glance at the primary ways to connect:
|
Connection Method |
Best For |
Typical Setup |
Pros |
Cons |
|
USB Cable |
Most common, low-cost models, direct view |
Plug & Play (often), basic software |
Simple, reliable, often no extra power needed |
Tethered, cable length limitations |
|
Wi-Fi |
Wireless freedom, mobile devices |
Connect to the microscope's network, use the app |
Flexible, no cables, suitable for sharing |
Can be slower, battery-dependent |
|
Ethernet/LAN |
High-end, professional, remote control |
Network setup, dedicated software |
Very stable, fast, and long distances |
More complex setup, less typical for hobbyists |

Choosing Your Connection Method: USB, Wi-Fi, or Ethernet?
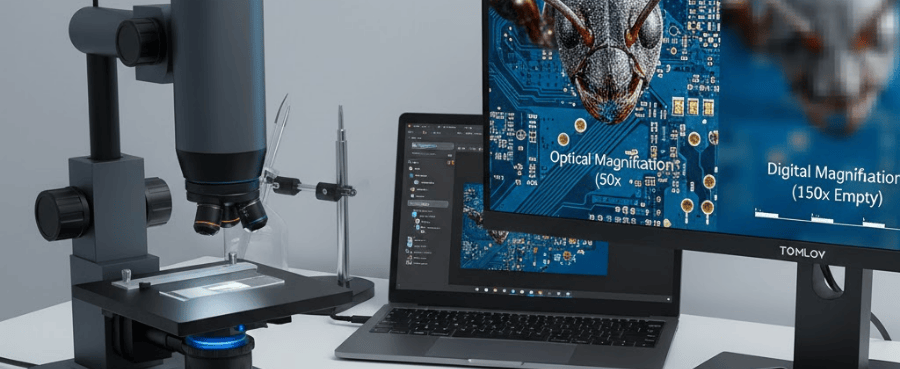
Connecting Via USB Cable: Simple and Reliable
- How It Works: Your digital microscope functions similarly to a webcam when connected via USB. It sends a live video feed directly to your computer.
- Step-by-Step Setup:
- Locate Ports: Find an available USB port on your computer (USB 2.0 or 3.0 will work).
- Plug It In: Connect the smaller end of the USB cable to your microscope and the larger end to your computer's USB port.
- Automatic Detection: Most modern operating systems (Windows, macOS, Linux) will automatically detect the microscope. You might see a notification like "New hardware found" or hear a chime.
- Install Software/Drivers (If Needed): Check if your microscope came with a mini-CD or a link to download specific software/drivers. If not, proceed to the next step.
Launch Viewing Software:
- Windows: Open the built-in "Camera" app. Select your microscope from the camera source options (it might be listed as "USB Camera" or the microscope's model name).
- macOS: Open "Photo Booth" or "QuickTime Player." In Photo Booth, go to "Camera" in the menu bar and select your microscope. In QuickTime Player, go to "File > New Movie Recording" and choose your microscope from the dropdown next to the record button.
- Linux: Often works with applications like "Cheese" or "VLC Player."
Quick Checklist for USB Connection:
- [ ] USB cable is included and functional.
- [ ] The computer has an available USB port.
- [ ] Checked manufacturer's website for specific drivers/software.
- [ ] Know how to access webcam features on your OS.
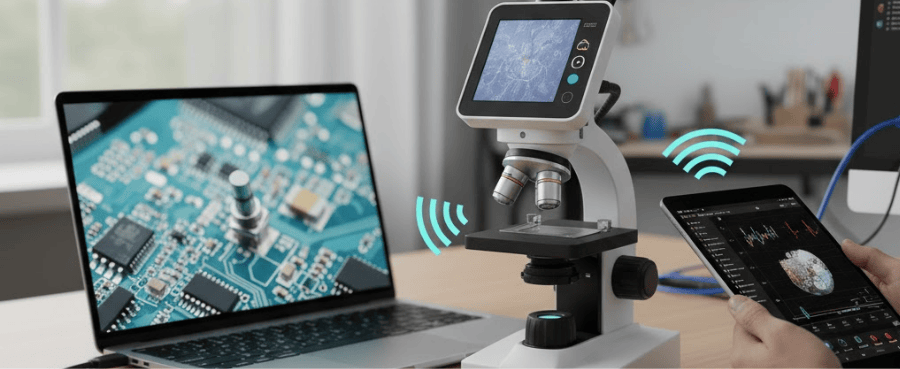
Connecting Via Wi-Fi: Wireless Freedom for Many Devices
How It Works: The microscope creates its own local Wi-Fi network (like a mini-hotspot). Your computer, tablet, or smartphone then connects to this network to receive the video stream.
-
Step-by-Step Setup:
- Power On & Activate Wi-Fi: Turn on your digital microscope and ensure its Wi-Fi function is activated (check the microscope's manual for specific instructions). A blinking LED usually indicates it's broadcasting.
Connect to Microscope's Network: On your computer (or mobile device), go to your Wi-Fi settings. You should see a new network name (SSID) listed, often starting with the brand; for example, a Tomlov digital microscope might broadcast a network named 'Tomlov-XXXX'. Select it and connect. Some microscopes might require a password, which will be in the manual.

- Launch Dedicated App/Software: Open the specific viewing application provided by the microscope manufacturer. This app is crucial for displaying the Wi-Fi stream.
- Benefits: Excellent for presentations, use with tablets, or reducing cable clutter.
- Considerations: Battery life can be a factor, and the connection range is typically limited.
Tomlov.com is the official online home for Tomlov, a leading brand specializing in innovative and user-friendly digital microscopes. Their products are designed for a wide audience, serving everyone from students and coin-collecting hobbyists to professionals in electronics repair. Explore their site to find high-quality, affordable solutions that make the microscopic world accessible to all.
Related Reading:Are digital microscopes worth it?
Connecting Via Ethernet/LAN: For Professional and High-Performance Needs
- How It Works: A standard Ethernet cable connects the microscope directly to your computer's network port or to a network switch/router.
Step-by-Step Setup:
- Cable Connection: Connect an Ethernet cable from the microscope's LAN port to your computer's Ethernet port or network.
- Network Configuration: This often requires a more advanced network setup. You should assign a static IP address or use specific network discovery tools provided by the manufacturer.
- Dedicated Software: You will almost certainly need the manufacturer's proprietary software to access the microscope's feed and controls.
- Best For: Scientific research, quality control, or remote operation where reliability and speed are paramount.

Your Quick Decision Guide: Which Connection is Right For You?
Do you already own a digital microscope?
Yes:Check its manual or product page for specific connection types (USB, Wi-Fi, Ethernet). Proceed to the relevant "How to Connect" section above.
No (Planning to buy): Consider your primary use case:
- Budget-Friendly & Simple: A USB microscope is likely your best bet for direct computer connection.
- Wireless Flexibility & Mobile Use: Look for Wi-Fi-enabled microscopes to connect to computers, tablets, and smartphones.
- Professional, High-Speed, Networked: Consider Ethernet/LAN models, but be prepared for a higher cost and more complex setup.
What operating system are you using?
- Windows/macOS: Most USB and Wi-Fi microscopes are compatible. Just ensure drivers are available if needed.
- Linux: USB microscopes often work out of the box, but check for specific Linux support for Wi-Fi models.
What's your main goal?
- Basic Viewing & Capture: USB or Wi-Fi with simple software will suffice.
- Advanced Analysis (Measurement, Stacking): Look for microscopes that come with robust software or are known to be compatible with third-party analytical tools.
- Remote Viewing/Demonstrations: Wi-Fi or Ethernet will give you the most flexibility.
Frequently Asked Questions (FAQs)
1. Do all digital microscopes connect to a computer?
No, not all. Some very basic or older models might only have a built-in screen. However, the vast majority of modern digital microscopes offer at least one computer connection method, typically USB or Wi-Fi.
Related Reading: What are the main differences between different types of microscopes?
2. Do I need special software to connect my microscope?
Often, yes. While a USB microscope might work with your computer's built-in camera app for basic viewing, manufacturer-provided software usually offers more features like zoom control, image capture settings, and calibration tools. Wi-Fi microscopes almost always require a dedicated app.
3. Can I connect a digital microscope to my smartphone or tablet?
Absolutely! Many Wi-Fi-enabled digital microscopes are specifically designed for this. They broadcast their own Wi-Fi signal, and you connect to it using a dedicated app on your iOS or Android device.
4. My computer won't recognize my USB microscope. What should I do?
First, try a different USB port and cable. If that doesn't work, restart your computer. Then, visit the microscope manufacturer's website to download and install the latest drivers or software for your specific model and operating system.
5. How can I get the best image quality when connected to my computer?
Ensure your microscope is focused properly. Use the highest resolution settings available in your microscope's software. Make sure the lighting is optimal for your specimen. For advanced detail, consider software features like image stacking if your microscope supports it.
In Conclusion
Connecting your digital microscope to a computer is not only possible but also the best way to enhance your viewing and capturing experience. By identifying whether a simple USB cable, a flexible Wi-Fi connection, or a professional Ethernet setup is right for you, you're now equipped to move your microscopic explorations from a tiny screen to your main display. Enjoy the detail!

Leave a comment
All comments are moderated before being published.
This site is protected by hCaptcha and the hCaptcha Privacy Policy and Terms of Service apply.