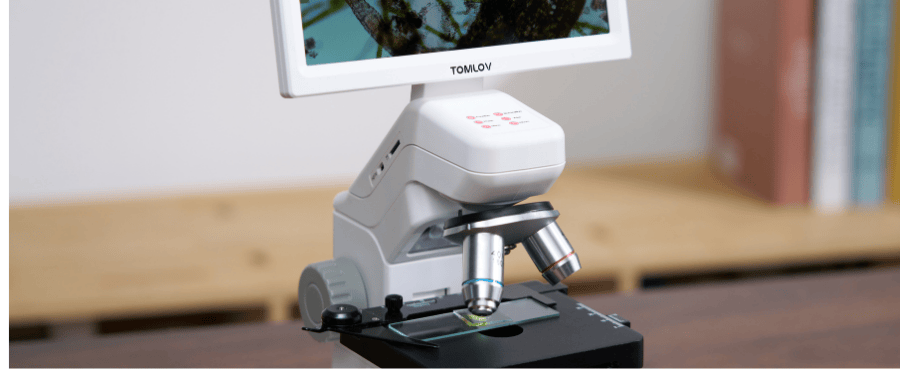
Ever stared at a microscope and wondered what that big, curved piece is actually for? This guide solves that mystery. We'll explore the arm's most critical functions, from providing structural support for precise imaging to its role as the primary handle for safe transport.
You will learn not just what the arm is, but the proper, two-handed technique for carrying the microscope to prevent costly damage. By the end, you'll be able to handle any microscope with confidence.
Key Structural Parts at a Glance
|
Part |
Primary Function |
Analogy |
|
Arm |
Connects the head to the base and is used for carrying. |
The spine |
|
Base |
Provides stable support for the entire instrument. |
The feet |
|
Head |
Holds the optical components (eyepieces, objectives). |
The head |
The Core Function of a Microscope Arm
At its simplest, the arm is the structural component that connects the microscope's head (which holds the eyepieces) to its base. Think of it as the spine of the microscope. It provides the framework that all the other critical components rely on.
Providing Structural Support
The arm's rigid construction is essential for maintaining the precise alignment between the lenses in the eyepiece and the objective lenses below. Any flexing or instability would make it impossible to get a clear, focused image. It’s the strong backbone that ensures everything stays perfectly still.
The Primary Handle for Transport
The most practical, hands-on function of the arm is to serve as a handle for carrying the microscope. Its curved, ergonomic design is made to be gripped securely. This is the designated spot for you to hold the instrument to move it safely.

How to Handle Your Microscope Correctly
Improperly carrying an arm microscope is one of the easiest ways to damage a delicate and expensive piece of equipment
A Step-by-Step Guide to Carrying Your Microscope
Follow this simple checklist every time you move your microscope to prevent accidents.
- Step 1: Clear the Way. Make sure your path from the storage location to your workspace is clear of any obstacles.
- Step 2: Grip the Arm Firmly. Use your dominant hand to get a firm, secure grip on the microscope arm.
- Step 3: Support the Base. Place your other hand flat underneath the base. This provides a second point of contact and supports the instrument's full weight.
- Step 4: Hold it Close. Keep the microscope upright and close to your body as you walk. This minimizes swinging and reduces the risk of bumping into anything.
- Step 5: Set it Down Gently. When you reach your destination, gently place the microscope on a flat, stable surface, well away from the edge.
A Quick Maintenance Tip
To ensure long-term stability, occasionally check that the arm is securely fastened to the base. On some models, screws can loosen over time with heavy classroom or lab use. A quick check can prevent wobbling and potential damage.
Quick Checklist for Microscope Handling
Use this guide to make a quick decision on how to handle your equipment correctly.
- Are you moving the microscope?
- YES: Use the two-handed carrying technique (one hand on the arm, one under the base).
- Are you just adjusting the focus or the slide?
- YES: Keep the microscope on the table. Do not use the arm to tilt or move it.
- Are you storing the microscope?
- YES: Carry it properly back to its storage case or cabinet. Ensure the lowest power objective is in place and the stage is lowered.
Frequently Asked Questions (FAQs)
Can I pick up a microscope just by its arm
No, you should never carry a microscope with only one hand on the arm. The weight is not evenly distributed, and you risk dropping it. Always support the base with your other hand.
2. What is the difference between the arm and the pillar?
The arm is the larger curved structure connecting the head to the base. Some microscopes also have a smaller pillar or post, which is the vertical piece to which the arm is attached, allowing for focus adjustments. The arm is the primary carrying handle.
3. Are all microscope arms the same?
While most compound microscopes have a similar C-shaped arm, the design can vary widely. Some stereo microscopes utilize long, articulated arms on boom stands, which are specifically designed for viewing large, opaque objects, such as circuit boards.
4. Why is the arm curved?
The classic C-shaped curve provides structural strength and creates space below the objective lenses for the stage and specimen. It also makes it ergonomic and easy to grip.
5. What happens if I drop my microscope?
Dropping a microscope can cause severe damage. The most common issues are misaligned lenses (making it impossible to focus), a broken illuminator (light source), or a cracked eyepiece. Repairs can be expensive, which is why proper handling is critical.

In Conclusion
So, the next time you see a microscope, you'll know the arm is far more than a simple connector. It's the structural backbone that ensures transparent, stable images and your designated handle for safe transport.
By consistently using the two-handed carrying method—one hand on the arm and the other supporting the base—you're not just following a rule; you're protecting the instrument for years of discovery. With this foundational knowledge, you're ready for the next step, and our guide on how to use a digital microscope will show you exactly what to do


Hinterlasse einen Kommentar
Alle Kommentare werden vor der Veröffentlichung geprüft.
Diese Website ist durch hCaptcha geschützt und es gelten die allgemeinen Geschäftsbedingungen und Datenschutzbestimmungen von hCaptcha.