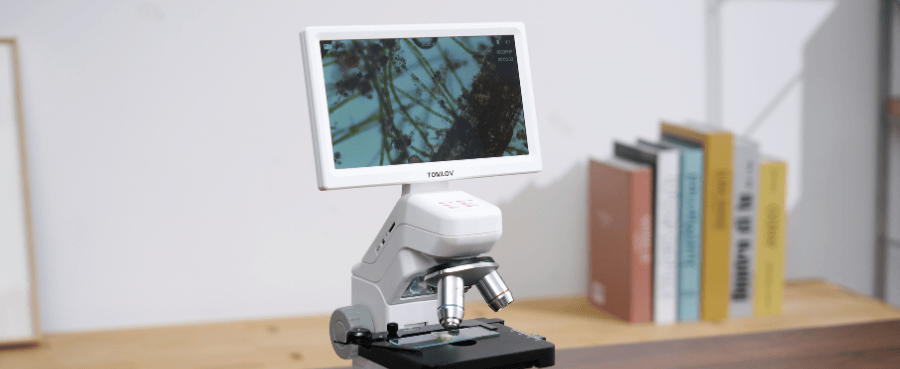
Many first-time users struggle with setup, focusing, and capturing clear images. The good news is, once you understand the basics, a digital microscope is simple to master.
In this article, we’ll show you exactly how to get started, from connecting your device via USB or Wi-Fi to adjusting focus and lighting for a sharp view, and capturing photos and videos of your observations. We’ll also share tips on stability, calibration, and troubleshooting common problems. By the end, you’ll feel confident using your microscope for hobbies, study, or professional work.
Setting Up Your Digital Microscope
Connect The Device Properly
The first step is connecting your microscope to the correct display. Depending on the model, this may be a USB, HDMI, or Wi-Fi connection.
-
USB connection: Most digital microscopes connect through USB. Many are plug-and-play, but some require drivers or software. If the device isn’t recognised, check the manufacturer’s website for drivers or updates.
- HDMI connection: Some models, such as the HDMI digital microscope, allow direct connection to a monitor or TV. This is ideal for classrooms, labs, or quality control environments where multiple people need to view the image simultaneously.
-
Wi-Fi connection: Portable models often connect to smartphones or tablets via apps. This is convenient, but it may introduce a slight lag compared to a wired setup.
💡 Tip: If your computer doesn’t recognise the device, try switching USB ports, replacing the cable, or restarting the system.
Related Reading:What Is A Digital Microscope And How Does It Work?
Check Compatibility
Before you start using your microscope, confirm that it’s compatible with your setup. While most work with Windows and Mac, some don’t support all mobile devices. For tablets or phones, you may need a Wi-Fi app or an OTG adapter.
Always check your manual or the brand’s website for compatibility notes. An older microscope may not support the latest operating systems, and some bundled apps may be outdated. Taking two minutes to confirm compatibility can save hours of frustration later.

Getting A Clear Image
Adjust The Focus Correctly
Getting a sharp image requires more than just turning the focus knob. Start at low magnification to find your subject, then gradually increase magnification once it’s centred. Adjust both the focus knob and the working distance (the distance between the lens and the object) for optimal results.
👉 Pro tip: Don’t get caught up in “1000x magnification” marketing claims. What really matters is the. Tools like the Tomlovdigital microscope offer sharp imaging even at moderate magnification, making them more reliable than models with exaggerated numbers.
The camera's resolution. A sharp 200x image is far more helpful than a blurry 2000x one.
Manage Lighting Settings
Lighting can make or break your viewing experience. Most digital microscopes come with built-in LED lights; however, knowing how to use them effectively is key.
-
Increase brightness for darker samples.
-
Dim the lights when viewing transparent items, such as plant tissues.
-
Angle the lights or use diffusers to reduce glare on shiny objects, such as coins, jewellery, or PCBs.
-
For advanced use, try polarisers or side-lighting to reveal hidden surface details.
Optimise Working Distance
The working distance determines the amount of space between the lens and the object.
-
For larger objects such as coins or circuit boards, raise the stand to create more room.
-
For tiny specimens, such as fibres or insect parts, bring the lens closer.
-
If your microscope has a very short working distance, use lower magnification to give yourself more space.
By balancing magnification, focus, and lighting, you’ll consistently get sharp, detailed images.

Capturing And Sharing Your Observations
Take Photos And Videos
Most digital microscopes allow you to capture images or record videos directly. Some models have a capture button on the device, while others rely on software. Files are usually stored on your computer, SD card, or mobile device.
✅ Step: Create a dedicated folder for your microscope images and videos. This keeps everything organised and easy to find later.
Manage And Share Files
Once you’ve captured your images, you’ll likely want to share them.
-
Classroom setting: Project onto a large screen for group learning.
-
Work use: Insert images into reports or presentations.
-
Hobby use: Share via email or cloud storage.
💡 Pro tip: If the bundled software is buggy, try free third-party apps or use HDMI/SD card capture to bypass software issues.
Keeping Your Microscope Stable
Use A Solid Stand
One of the most common frustrations is image shake caused by flimsy stands. To avoid this:
-
Choose microscopes with sturdy metal stands instead of lightweight plastic.
-
Add a clamp or weighted base if your stand wobbles.
Avoid Vibrations
-
Place your microscope on a stable desk or table.
-
Keep your hands steady when adjusting focus.
-
For tasks like soldering, look for models that allow hands-free stability while leaving space to work.
A stable setup is critical for getting sharp images, especially at higher magnifications.
Calibrating For Accurate Measurements
Why Calibration Matters
For casual users or students, calibration may not be necessary. However, for professionals such as jewellers, industrial inspectors, or researchers, calibration ensures accurate measurements of small features.
How To Calibrate
-
Use a calibration slide, usually included with professional microscopes.
-
Adjust the software’s measurement tools to align with the slide.
-
Save the calibration profile so your measurements remain consistent in future sessions.
Calibration may seem technical, but once it’s set up, it’s simple to use and critical for quality control or scientific work.
Care And Maintenance Tips
Even though digital microscopes are relatively low-maintenance, taking care of them properly ensures longer life and better performance.
-
Keep the lens clean: Use a microfiber cloth or lens paper to gently wipe away dust. Never use household cleaners.
-
Avoid touching the lens: Fingerprints can cause smudges that reduce image clarity.
-
Store safely: When not in use, cover the microscope or keep it in its box to protect it from dust and moisture.
-
Handle with care: Don’t force the focus knob or over-tighten stands.
-
Prevent overheating: If using LEDs for long periods, take breaks to avoid excessive heat buildup.
These small habits will help your microscope stay accurate and reliable for years.
Common Problems And FAQs
Device Not Recognised
-
Problem: The Microscope isn’t detected by the computer.
-
Solution: Check the USB cable/port, install drivers, or update your OS.
Blurry Images
-
Problem: Image remains unclear.
-
Solution: See focus and lighting tips above. Most issues come from incorrect working distance, unstable stands, or poor lighting.
Laggy Video Feed
-
Problem: Live view is slow or delayed.
-
Solution: Use faster USB 3.0 ports or HDMI connections, and close background apps.
Overheating LEDs
-
Problem: Built-in lights heat up or fade during long use.
-
Solution: Don’t leave LEDs on for extended periods, take breaks, or use external lighting.
Poor Manuals Or Instructions
-
Problem: Guides are incomplete or poorly translated.
-
Solution: Look for video tutorials online or download updated instructions from the brand’s website.
Can A Digital Microscope Replace A Traditional Microscope?
Not entirely. Digital microscopes are fantastic for imaging, teaching, and inspections, but optical microscopes remain better for ultra-high magnification biological studies.
What Magnification Do I Need For Coins Or PCBs?
-
Coins: 10x–200x is sufficient.
- PCBs: 50x–500x works best for soldering and chip inspection.
Related Reading: Digital vs. Optical Microscopes: An In-Depth Comparison
Do Digital Microscopes Work With Both Mac And Windows?
Yes, most do. For fewer issues, use HDMI or SD card models, which avoid software problems.
Are Digital Microscopes Good For Kids?
Yes. They are safer and easier to use than optical microscopes since there are no fragile eyepieces, and the screen display makes group learning simple.
Conclusion
Using a digital microscope may seem complicated at first, but once you understand the basics of setup, focusing, lighting, and file management, it becomes an incredibly powerful tool. By keeping your microscope stable, calibrating when necessary, practising proper care, and troubleshooting common issues, you’ll get sharp images and smooth performance.
Whether you’re a hobbyist checking coins, an engineer inspecting PCBs, a teacher engaging students, or a professional documenting materials, digital microscopes make the invisible world accessible and easy to share. With the right techniques, you’ll get the most out of your device and feel confident every time you use it.


Dejar un comentario
Todos los comentarios se revisan antes de su publicación.
Este sitio está protegido por hCaptcha y se aplican la Política de privacidad de hCaptcha y los Términos del servicio.