Comparison Table: Three Common Types of Kids' Microscopes
|
Type |
Best For |
Magnification |
Highlights |
|
Stereo Microscope |
Ages 4–8; bugs, leaves, coins |
10×–40× |
Easy focus, 3D image, durable |
|
Compound Microscope |
Ages 9–14; slides & cells |
40×–400× |
Clear cell view, dual illumination |
|
|
All ages; sharing, classrooms |
Variable |
Built-in screen, easy viewing, and recording |
1. Match the Microscope to Your Child’s Age
The first step is matching the microscope to your child’s age and curiosity level.
Children aged 4–7 usually enjoy stereo microscopes because they can observe everyday 3D objects like leaves, sand, or coins without any complicated setup.
Kids aged 8–12 are ready for compound microscopes, which allow them to explore thin slides such as onion cells, fabrics, or pond water.
For teens, a compound or digital microscope is ideal, offering higher precision, better lighting, and the ability to capture real research-style observations.
Rule of thumb: if setup takes longer than five minutes, it’s too complex for a beginner.
2. Choose the Right Type for the Right Purpose
2.1 Stereo Microscopes – Perfect for First-Time Explorers
Stereo microscopes provide three-dimensional images of solid, opaque objects, making them ideal for beginners. They are typically equipped with both top and bottom illumination, allowing for clear observation of natural objects such as insects, shells, or rocks.
Choose a stereo microscope with dual illumination, a metal frame, and a large focusing knob that is easy to operate with small hands.
2.2 Compound Microscopes – For Budding Scientists
Compound microscopes deliver higher magnification (40×–400×) and are used for observing transparent or thin samples such as plant cells, fibers, or bacteria.
Look for glass optics, coarse and fine focus knobs, and dual LED illumination to ensure bright, detailed images.
Avoid low-cost microscopes claiming “1600× or 2000× magnification” — they typically use poor-quality lenses and offer little clarity.
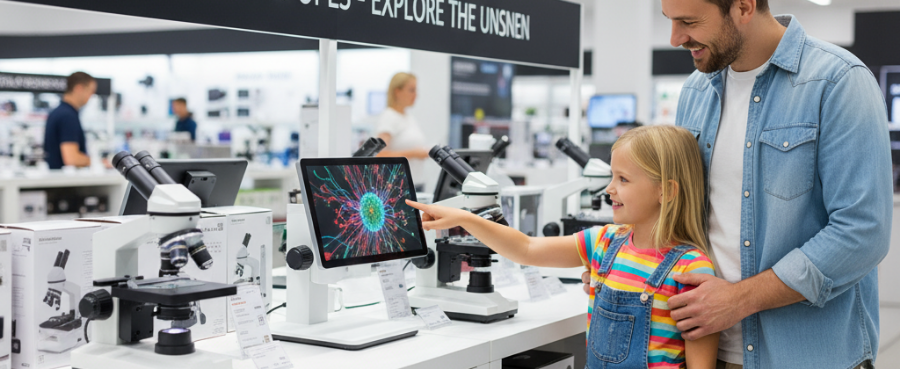
2.3 Digital Microscope – Easy Viewing for All Ages
Unlike traditional microscopes that require peering through small eyepieces, Tomlov digital microscopes feature a built-in display screen, making them easy and fun for all ages. Even younger children who haven’t learned how to align their eyes can clearly see the specimen on the screen.
The large display also allows parents, teachers, or classmates to view together, making it ideal for group study or classroom activities. It’s a great choice for visual learners who benefit from seeing details up close in real time.
When choosing one, focus on:
-
Screen quality – a bright, sharp IPS screen (7–10") provides excellent visibility.
-
Camera resolution – at least 2 megapixels for crisp photos and videos.
-
Adjustable LED brightness – ensures proper lighting for different specimens.
-
Stable, adjustable stand – keeps the image steady and focusing smooth.
Because these microscopes don’t require an eyepiece, they’re especially suited to beginners and families, bridging the gap between early curiosity and advanced exploration.

3. Focus on Optical Quality, Not Just Magnification
A common mistake is chasing the biggest magnification number. In reality, clarity matters more than power.
A clear 400× image is far better than a blurry 1200× one. Look for achromatic glass lenses, wide-field eyepieces (WF10×/WF20×), and a stable metal base for best results.
If a microscope seems too cheap for its claimed specifications, it’s likely a toy rather than a real optical instrument.
4. Comfort and Ease of Use Matter
Comfort affects how often kids will actually use the microscope.
An inclined head (45°–60°) reduces neck strain, while interpupillary and diopter adjustments ensure better focus for different users.
Younger children can start with coarse focus only, while older students should use microscopes with fine-tuning knobs.
If your child wears glasses, choose models with soft rubber eyecups. Adjustable LED brightness also helps protect eyes during longer sessions.
5. Build Quality and Safety You Can Rely On
Good build quality makes a big difference. Choose microscopes with a metal frame, a non-slip base, and a smooth focus system.
Cordless LED power is safer for kids, and focus locks prevent accidental over-adjustment.
If the microscope will be moved between school and home, a carrying handle or storage case adds convenience and protection.
6. Accessories That Make Learning Fun
A great microscope kit usually includes:
-
Prepared slides so kids can start exploring right away.
-
Blank slides, coverslips, and tweezers for DIY experiments;
-
Droppers and stains to prepare their own samples.
Digital microscopes often include photo and video recording features, letting kids document their discoveries.
Encourage them to keep a microscope journal — sketching, labeling, or writing about what they find helps build observation and analytical skills.
7. Budget and Value Guide
Here’s what to expect in different price ranges:
-
Under $75: Entry-level “toy” microscopes — fun for curiosity, but limited optics.
-
$100–$200: The best value range — real glass lenses, dual lighting, solid image quality.
- $200–$400: For long-term use — features like fine focus, mechanical stages, or built-in LCD screens.

8. Safety and Maintenance Tips
Teach your child these three easy habits:
-
Always carry the microscope with one hand under the base and one on the arm.
-
Clean lenses using lens paper only — never tissues or cloth.
-
Cover the microscope with a dust cover when not in use.
9. Step-by-Step Decision Guide
Step 1: Define your child’s age and learning interest (outdoor explorer or biology lover).
Step 2: Choose the right type — stereo for 3D objects, compound for slides, or standalone LCD for easy screen viewing.
Step 3: Set your budget and prioritize optical clarity over magnification claims.
Step 4: Check comfort — adjustable head, fine focus, soft eyecups.
Step 5: Pick a model with good accessories, a durable build, and reliable warranty support.
Frequently Asked Questions
1. What magnification is best for kids?
Usually, 40×–400×is perfect. Higher magnification often adds complexity without real benefits for beginners.
2. Are Digital microscopes suitable for young children?
Yes — their large built-in screens make viewing easy for all ages, even for children who can’t yet use eyepieces properly.
3. Can a digital microscope connect to a computer?
Yes. Many digital microscopes for kids include USB or HDMI ports, allowing you to connect them to a computer or external monitor for larger viewing or saving images and videos directly.
4. How can I keep a microscope in good condition?
Clean the lenses with lens paper, store them under a dust cover, and avoid direct sunlight or moisture.
5. What’s the difference between an optical and a Digital Microscope?
Optical microscopes rely on eyepieces, while digital versions display images directly on-screen — easier for sharing and group learning.
Conclusion
A kids’ microscope should do more than magnify — it should ignite curiosity and inspire discovery.
Whether you choose a simple stereo model, a detailed compound scope, or an easy-view Digital Microscope, focus on clarity, comfort, and durability.
With the right choice, your child won’t just look at the world — they’ll start exploring it up close, one fascinating detail at a time.


Laisser un commentaire
Tous les commentaires sont modérés avant d'être publiés.
Ce site est protégé par hCaptcha, et la Politique de confidentialité et les Conditions de service de hCaptcha s’appliquent.