
Table of Contents
Repairing a mechanical watch requires extreme precision and a clear view of microscopic components. This guide explains how to select, set up, and effectively use a microscope for horology. You will learn practical techniques for inspecting gears, placing tiny screws, and reducing eye strain.
Why Use a Microscope for Watch Repair
Working on mechanical timepieces pushes the limits of human vision. Relying solely on a traditional jeweler's loupe for extended periods is often inefficient. Integrating a microscope into your workflow provides three massive advantages:
See Tiny Components More Clearly: A microscope magnifies hairsprings, pivot jewels, and escapement wheels far beyond basic loupes, revealing structural details you would otherwise completely miss.
Improve Precision During Watch Repairs: With a highly magnified, stable view of your workspace, your hand-eye coordination increases drastically. You can guide tweezers and oilers with absolute accuracy.
Reduce Eye Strain During Detailed Work: Squinting through a single ocular loupe causes severe facial fatigue and headaches. A microscope allows you to maintain a relaxed posture and use both eyes, or view a screen, comfortably for hours.
Choose the Right Microscope for Watch Repair
Not all magnification tools are suited for the workbench. Horology requires specific physical and optical features to be truly effective.
Select the Right Magnification Range
For watchmaking, extreme magnification is usually unnecessary and counterproductive. A range between 5x and 20x is ideal for general assembly and disassembly. For detailed inspection of pivot wear or escapement lubrication, pushing up to 40x or 50x provides the necessary clarity without sacrificing your field of view entirely.
Consider Working Distance and Workspace
Working distance is the physical gap between the bottom of the lens and the watch movement. This is the most critical specification for horology. You must have enough vertical room to hold tweezers, screwdrivers, and oilers at natural angles without bumping your knuckles against the camera housing or optical glass.

Check Image Quality and Lighting Features
A blurry image is useless when dealing with microscopic screws. Prioritize systems with high-quality optical glass or high-definition digital sensors. Equally important is the lighting. Metal watch parts are highly reflective, so you need adjustable, multi-directional lighting to eliminate harsh glares and illuminate deep crevices within the gear train.
Set Up Your Microscope for Watch Repair
Proper preparation of your bench ensures a smooth repair process and prevents accidental damage to fragile caliber parts.
Position the Watch Movement Properly
Never place a bare watch movement directly onto a hard microscope stage. Always use a proper movement holder or a soft, anti-static cushion to secure the caliber. Ensure the movement sits perfectly flat so the gears remain in a consistent focal plane as you pan across the mechanism.
Adjust Focus and Magnification Settings
Start with your microscope zoomed out to its lowest magnification setting. Use the coarse focus knob to bring the entire watch movement into sharp relief. Once you have a clear overview, you can safely zoom in on a specific bridge or jewel, using only the fine focus knob to make micro-adjustments.
Set Up Proper Lighting for Clear Views
Mechanical watches are filled with polished steel and brass components that bounce light aggressively. Avoid shining a single, bright beam directly down onto the movement. Instead, use angled side lights or a diffused ring light to cast soft illumination across the surface, creating tiny shadows that highlight depth and texture.
How to Inspect Watch Parts Under a Microscope
Knowing what to look for under the lens separates an amateur tinkerer from a skilled watchmaker.
Examine Gears and Moving Components
When inspecting the gear train, look closely at the individual teeth of the wheels and the steel pinions they interact with. Under magnification, you are searching for microscopic burrs, bent teeth, or uneven wear patterns that indicate friction. You can also verify that the synthetic ruby jewels are perfectly intact and free of cracks.
Check Screws and Small Watch Parts
Watch screws are notoriously tiny and easily damaged by incorrect screwdriver blades. Use your microscope to inspect the screw heads for chewed slots or stripped threads. You can also examine delicate components like the pallet fork and the hairspring for perfect alignment before attempting to install them into the movement.
Find Scratches, Dust, and Wear Marks
Before sealing a watch case, a microscopic inspection is mandatory. Magnification reveals stray fibers from cleaning cloths, microscopic flakes of dry skin, or dried oil residue hiding under bridges. Spotting these contaminants early prevents them from migrating into the gear train and stopping the watch weeks later.
How to Use a Microscope During Watch Repairs
Transitioning from viewing parts to actively working on them requires careful coordination and the right equipment setup.
Keep Both Hands Free for Tools
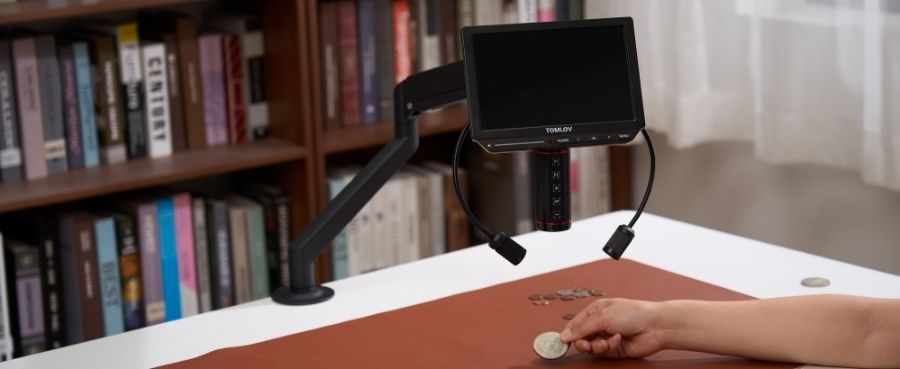
Effective watchmaking requires the simultaneous use of both hands—one to hold the tweezers and the other to operate a screwdriver or oiler. A microscope mounted on a heavy boom stand or a stable vertical pillar keeps the optics securely hovering over your workspace, leaving your hands entirely unencumbered to manipulate the movement.
Align and Install Tiny Components
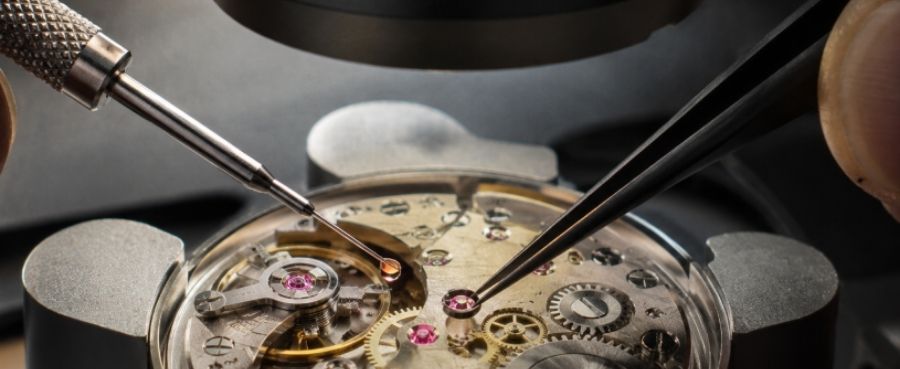
Placing a microscopic pivot into a jewel hole requires absolute visual certainty. A microscope allows you to watch the pivot drop perfectly into place in real-time, preventing you from accidentally crushing the fragile metal with your tweezers. It also makes applying microscopic drops of specialized oil to shock absorbers significantly easier and cleaner.
Inspect Your Work After Assembly
After securing a bridge or setting a hand, verify your work before moving to the next step. You need to ensure gears spin freely and parts are perfectly seated. Utilizing a digital system equipped for mechanical positioning, such as the Tomlov DM301 Max Digital Microscope, streamlines this final check. Its integrated X-Y mechanical stage allows you to smoothly glide the fully assembled movement under the lens using precise control knobs, letting you systematically scan the entire caliber on the large digital screen without awkwardly touching the delicate parts with your hands.

Tips to Get Better Results With a Watch Repair Microscope
A few simple habits will dramatically improve your comfort and the quality of your images during long repair sessions.
Keep the Lens and Workspace Clean
Dust on your lens can easily be mistaken for dust inside the watch movement. Wipe your optical elements regularly with dedicated microfiber cloths and lens cleaning solutions. Additionally, maintain a spotless, uncluttered workbench to prevent tiny springs from ricocheting out of sight if you accidentally drop them.
Use Stable Adjustments and Proper Positioning
A microscope is only as good as its foundation. Ensure your heavy base is placed on a solid desk that does not wobble when you rest your elbows. Adjust the height of your chair and the tilt of the microscope head so you can look straight into the eyepieces or monitor without hunching your shoulders or straining your neck.
Practice With Simple Watch Components First
Working under magnification alters your depth perception and hand-eye coordination. Do not start by disassembling a highly complex, expensive chronograph. Practice picking up, moving, and placing screws on an oversized, broken pocket watch movement until your brain adapts to the magnified visual feedback.
Final Thoughts
Transitioning from a standard loupe to a digital microscope fundamentally elevates the quality of your watch repair work. By choosing a system with adequate working distance, mastering your lighting setup, and utilizing stable magnification, you eliminate the guesswork associated with micro-mechanics. Whether you are inspecting delicate hairsprings or applying microscopic drops of oil, this tool ensures absolute precision and transforms highly stressful tasks into controlled, manageable procedures.
FAQs About Microscope for Watch Repair
Is a stereo microscope better than a digital microscope for watches?
Stereo microscopes are traditionally preferred by professional watchmakers because their dual optical pathways provide true three-dimensional depth perception, making it easier to judge the exact vertical position of tweezers. However, digital microscopes offer superior ergonomics and screen-sharing capabilities, making them excellent for quick inspections and documentation.
What is the best magnifier for watch repair?
A standard jeweler's loupe (usually between 3x and 10x) is the best traditional magnifier for quick inspections and basic assembly. For extended sessions, detailed oiling, or intricate hairspring manipulation, a boom-mounted microscope is vastly superior due to its stability and high magnification power.
What magnification do watchmakers use?
For general assembly and everyday tasks, watchmakers typically use 3x to 5x magnification. For more complex procedures, such as inspecting escapement geometry, checking pivot wear, or applying synthetic oils, they will frequently increase the magnification to between 10x and 20x.
What is the best microscope for electronics repair?
While similar to watch repair, electronics repair often requires even more working distance for large hot air rework stations and soldering irons. The best models for electronics are typically digital or stereo microscopes mounted on large, articulating boom arms that can easily swing across wide circuit boards.
What tools do I need to repair watches?
Beyond magnification, the absolute essential tools include high-quality anti-magnetic tweezers, a set of precision watchmaker screwdrivers, movement holders, a hand removal tool, specialized watch oils, fine oilers, and a dust blower bulb to keep the movement clean during assembly.


Hinterlasse einen Kommentar
Alle Kommentare werden vor der Veröffentlichung geprüft.
Diese Website ist durch hCaptcha geschützt und es gelten die allgemeinen Geschäftsbedingungen und Datenschutzbestimmungen von hCaptcha.